Category: Social Media

  • Social media automation token expiry: when connections break silently

    Social media automation token expiry: when connections break silently

    Social media automation token expiry: when connections break silently
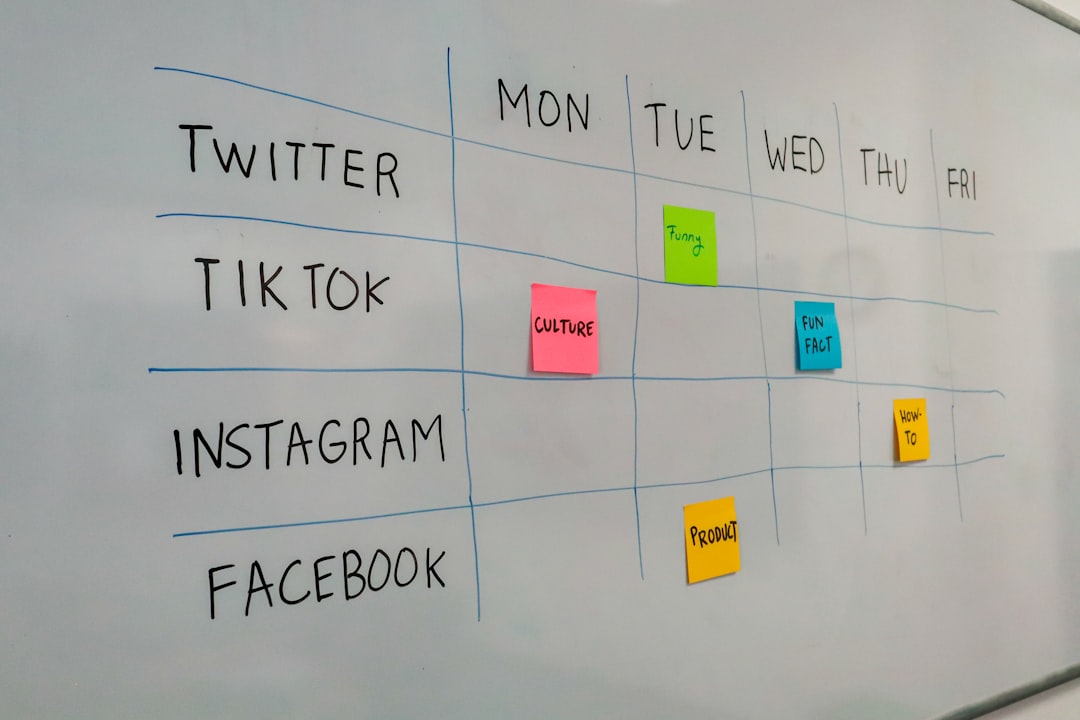
    Photo by Deng Xiang on Unsplash

    Most social media automation tools connect to platforms using OAuth tokens. These tokens grant permission for one app to post, read analytics, or manage content on your behalf. They’re invisible until they stop working.

    The problem: tokens expire. Some platforms revoke them after 60 days of inactivity. Others refresh them automatically—until they don’t. When a token dies, your scheduled posts vanish into the void, your cross-posting stops, and you won’t know until you check manually or a follower asks why you went quiet.

    Here’s what actually happens, platform by platform, and how to catch failures before they cost you a week of missing content.

    How long tokens last, and what triggers expiry

    Twitter/X: Access tokens don’t expire on a fixed schedule, but the platform can revoke them if you change your password, revoke app permissions, or if Twitter detects suspicious API activity. In practice, tokens last months—until they don’t. No warning email.

    LinkedIn: Access tokens expire after 60 days. Refresh tokens last 12 months. If your automation tool doesn’t request a new access token within that 60-day window, the connection dies. LinkedIn sends no notification when this happens. Your posts just stop going out.

    Facebook/Instagram (Meta): Short-lived tokens expire in one hour. Long-lived tokens last 60 days. Most tools exchange short for long automatically, but if you don’t generate user activity within 60 days, the token goes stale. Meta’s Business Suite sometimes emails you, but the Developer dashboard doesn’t surface token health unless you check manually.

    YouTube: Refresh tokens don’t expire unless revoked manually or the account is inactive for six months. Google sends no proactive alert.

    The common thread: expiry is silent. Platforms assume the app developer—not you, the end user—will handle monitoring.

    What breaks when a token dies

    Most automation tools fail gracefully in the UI—they’ll show “connection lost” or “re-authenticate”—but they don’t always notify you by email or Slack. If you’re not logging into the tool daily, you won’t see it.

    Here’s what stops working:

    • Scheduled posts queue locally but never publish
    • Cross-posting from RSS feeds or your CMS halts
    • Analytics dashboards stop updating
    • Auto-replies, comment moderation, or DM automation freeze

    Some tools retry silently for 24–48 hours, then mark the post as failed. Others drop it entirely. Publer surfaces connection errors in its dashboard and sends email alerts if a publish attempt fails, but only if you’ve enabled notifications in settings—it’s off by default.

    Buffer queues failed posts and flags them, but won’t re-attempt after the connection is restored unless you manually reschedule. Hootsuite logs errors in the activity feed, but doesn’t push a notification unless you’ve configured a webhook.

    How to catch token expiry before it breaks your workflow

    Enable failure notifications in your scheduler. Every tool has this setting buried somewhere. Turn on email or Slack alerts for failed publishes, not just successful ones.

    Set a monthly calendar reminder to check connected accounts. Log in, review the integrations page, and confirm each platform shows “connected” with a recent timestamp. If a token is about to expire, some tools show a yellow warning icon—but only if you’re looking.

    Test with a throwaway post once a month. Schedule a post to all connected accounts for immediate publish, then verify it went live. Delete it 60 seconds later. This forces the tool to use the live token and surfaces any silent failures.

    Use a secondary monitoring tool if your workflow is critical. If you’re running a client account or a high-frequency publishing schedule, set up a simple uptime monitor that checks your social profiles for new posts. services like UptimeRobot or a custom Zapier workflow can ping you if no new content appears within an expected window.

    When to re-authenticate vs. when to rebuild the connection

    If your tool shows “re-authenticate,” clicking the button usually refreshes the token without losing your queue or settings. Do this immediately.

    If the re-auth flow fails—common with LinkedIn and Meta—you’ll need to fully disconnect and reconnect the account. This often clears your scheduled post queue for that platform. Before disconnecting, screenshot or export your queue. Most tools don’t preserve drafts when you sever a connection.

    Some operators keep a backup auth token in a separate tool (e.g., one account connected in Buffer, the same account also connected in Publer) so if one breaks, the other can cover while you troubleshoot. This adds overhead, but it’s cheaper than losing a week of posts.

    Want to avoid these silent breaks? Subscribe to One Two Three Send for operator-focused breakdowns of what actually fails—and how to fix it before it costs you traffic.

    Heads up — some links in this article are affiliate links. If you sign up through them, we may earn a small commission at no extra cost to you. We only recommend tools we use ourselves.


  • Buffer vs. Publer vs. Hootsuite: scheduling APIs, queue limits, pricing

    Buffer vs. Publer vs. Hootsuite: scheduling APIs, queue limits, pricing

    Buffer vs. Publer vs. Hootsuite: scheduling APIs, queue limits, pricing
    Photo by Rubaitul Azad on Unsplash

    If you’re running content across Twitter, LinkedIn, Instagram, and Facebook, you need a scheduler that won’t drop posts, hit arbitrary limits, or charge you triple when you add a second brand account.

    Here’s how Buffer, Publer, and Hootsuite stack up for solo operators and small teams publishing 50–300 posts a month across 3–6 accounts.

    Queue depth and post limits

    Buffer’s free tier lets you schedule 10 posts per connected account. The Essentials plan ($6/month per channel) removes the queue cap but limits you to one user. If you’re managing client accounts or a team, you’ll need Team at $12/month per channel—which gets expensive fast if you’re active on four networks.

    Publer‘s free plan allows 10 scheduled posts total, but its Professional tier ($12/month) gives you unlimited scheduling across unlimited accounts and workspaces. That’s the same price Buffer charges per channel. If you’re cross-posting to five platforms, Publer saves you $48/month.

    Hootsuite’s pricing starts at $99/month for one user and 10 social accounts. The platform is built for agencies and enterprises—overkill unless you’re managing 20+ accounts or need approval workflows.

    Platform support and media handling

    All three handle Twitter, Facebook, LinkedIn, and Instagram. Publer also supports Pinterest, TikTok, YouTube, Mastodon, and Google Business—useful if you’re diversifying or testing new channels without adding another tool.

    Buffer compresses images above 5MB and doesn’t warn you before upload. If you’re scheduling high-res carousels or infographics, check the preview carefully—some detail gets lost. Publer and Hootsuite both preserve originals up to 8MB and 10MB respectively, then compress with a warning.

    Video support varies. Buffer caps video uploads at 512MB and transcodes everything to MP4. Publer allows up to 1GB and supports more native formats. Hootsuite allows 512MB but charges extra for bulk video libraries on lower tiers.

    Scheduling reliability and API quirks

    Buffer and Publer both use direct platform APIs. Posts queue client-side, then fire via webhook at the scheduled time. If the API is down (rare but it happens—Twitter’s API went dark for 90 minutes in May), your post waits in retry for up to four hours before failing silently. Neither tool emails you when a post fails unless you explicitly enable notifications in settings.

    Hootsuite uses a hybrid model: some posts go direct, others route through Hootsuite’s proxy layer for compliance monitoring. This adds 15–30 seconds of delay but catches posts that violate platform TOS before they go live. Helpful if you’re managing clients; irrelevant if you’re solo.

    One non-obvious issue: Instagram carousel scheduling fails on all three platforms if your images have mismatched aspect ratios. The API rejects the batch and gives a generic error. Publer’s preview catches this before you schedule; Buffer and Hootsuite don’t flag it until the post fails.

    Pricing summary

    • Buffer: $6/month per channel (Essentials), $12/month per channel for teams. Free tier: 10 posts per account, 3 channels max.
    • Publer: $12/month for unlimited posts and accounts (Professional). Free tier: 10 total scheduled posts, 3 accounts.
    • Hootsuite: $99/month (Professional), includes 10 accounts and one user. Free tier: 2 accounts, 5 scheduled posts.

    Who each is best for

    Pick Buffer if you’re only active on two or three platforms, post fewer than 50 times a month, and want the simplest possible interface. It’s clean, fast, and doesn’t try to upsell analytics dashboards you don’t need.

    Pick Publer if you’re cross-posting to four or more networks, testing new platforms like Mastodon or TikTok, or running multiple brands from one account. The per-channel pricing model makes it the cheapest option once you pass three active accounts.

    Pick Hootsuite only if you’re managing 10+ accounts for clients, need approval workflows, or require compliance logging for regulated industries. Everyone else is overpaying.

    One last note: all three platforms let you connect Google Analytics UTM parameters automatically. Buffer and Publer apply them at the account level; Hootsuite requires manual tagging per post unless you set up a campaign template. If attribution matters to you, test this before committing.

    Want more tool breakdowns like this? Subscribe to One Two Three Send for weekly comparisons, tutorials, and operator Q&A—no fluff, just the details that matter when you’re running a one-person content business.

    Heads up — some links in this article are affiliate links. If you sign up through them, we may earn a small commission at no extra cost to you. We only recommend tools we use ourselves.
  • Scheduled post APIs fail silently—here’s what gets dropped

    Scheduled post APIs fail silently—here’s what gets dropped

    Scheduled post APIs fail silently—here's what gets dropped
    Photo by David Pupăză on Unsplash

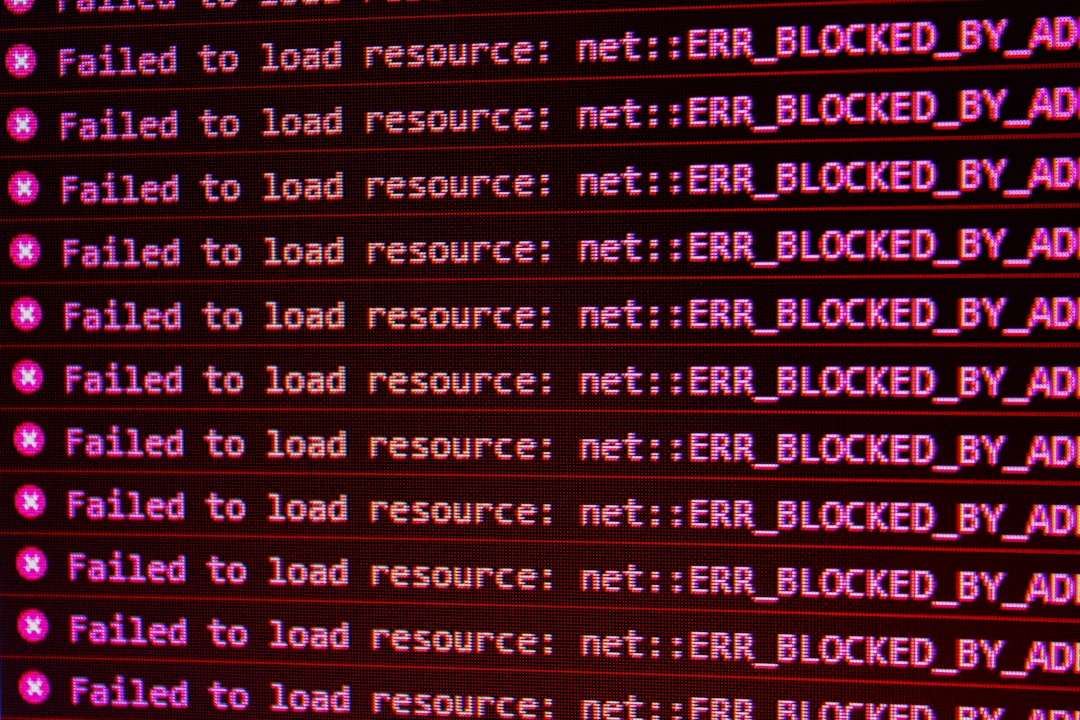
    Scheduled posts disappear more often than you think. Not because you misconfigured the time zone or forgot to hit publish—because the API between your scheduling tool and the destination platform failed, and nothing told you.

    If you’re running a content business that depends on scheduled social posts, WordPress post queues, or automated newsletter sends, you’ve probably experienced this: a post that was queued for 9 AM simply never appeared. No error email. No dashboard alert. Just silence.

    Here’s what actually breaks, and how to catch it before your audience notices.

    Why scheduled post APIs fail

    Most scheduling tools—whether it’s Buffer, Publer, CoSchedule, or WordPress’s native post scheduler with a third-party plugin—rely on API calls to the destination platform. Those calls can fail for three common reasons:

    API rate limits. Twitter, LinkedIn, and Facebook all enforce per-hour or per-day post limits. If your account or app hits that ceiling, subsequent requests get rejected. Some tools queue the retry; most just drop it.

    Expired access tokens. OAuth tokens that connect your scheduler to Instagram, LinkedIn, or YouTube expire after 60–90 days depending on the platform. If the tool doesn’t refresh the token automatically—or if the refresh fails—your post never leaves the queue.

    Webhook timeouts. WordPress post schedulers that rely on WP-Cron or external services like EasyCron depend on HTTP requests firing at the right time. If your server is under load, or the webhook times out, the post stays in “scheduled” status indefinitely.

    None of these scenarios generate user-facing errors by default. The tool logs the failure internally, but you don’t see it unless you check the logs—and most solo operators don’t.

    What actually gets dropped

    The content most likely to disappear:

    Social posts scheduled in bulk. If you queue 20 posts at once and token #14 expires mid-batch, posts 15–20 never publish. The tool may show them as “sent” in the UI because the request was attempted, not because it succeeded.

    WordPress posts with complex taxonomies. If your scheduled post includes custom fields, featured images hosted on an external CDN, or category assignments that depend on another plugin, and any of those dependencies fail to load at publish time, WordPress either publishes a broken version or silently reschedules it.

    Newsletter sends via third-party integrations. If you schedule a newsletter send through Zapier or Make, and the ESP’s API returns a 429 (rate limit) or 401 (auth error), the automation may not retry. Your send just… doesn’t happen.

    How to catch failures before your audience does

    Set up three checks:

    Daily log review. Most scheduling tools bury error logs in settings or account dashboards. Set a recurring calendar event to check them. Look for HTTP 4xx or 5xx codes, token expiration warnings, or “retry failed” entries. If you’re using Publer, the activity log shows per-post status codes. For WordPress, the WP Crontrol plugin exposes missed or failed cron events.

    Automated monitor for published content. Use an RSS monitor like Feedly or an uptime tool like Better Uptime to ping your site’s feed or social profile every hour. If a scheduled post doesn’t appear in the feed within 15 minutes of its scheduled time, you get an alert. This won’t tell you why it failed, but it will tell you that it failed.

    Redundant token refresh. For tools that use OAuth, manually refresh tokens once a month even if the tool says they’re valid. Most platforms let you revoke and re-authorise without losing post history. This preempts 90% of silent token expiration failures.

    When to stop scheduling and publish manually

    If you’re publishing fewer than five posts a week across all channels, the operational overhead of monitoring scheduled post APIs often exceeds the time saved. Manual publishing takes 60 seconds per post. Debugging a silent API failure, reconstructing what didn’t publish, and re-queuing it takes 20 minutes.

    The break-even point: if you’re scheduling more than 25 posts a month, automation saves time. Below that, the risk of silent failure isn’t worth it unless you’ve built the monitoring workflow described above.

    One exception: if your content is time-sensitive—launch announcements, event coverage, earnings commentary—always publish manually or use a tool with guaranteed delivery SLAs and real-time alerting. Most don’t offer that.

    Read more like this

    If you found this useful, subscribe to One Two Three Send—we publish operator-focused breakdowns like this one every day. No fluff, no beginner listicles, just the technical details that matter when you’re running a content business solo.

    Heads up — some links in this article are affiliate links. If you sign up through them, we may earn a small commission at no extra cost to you. We only recommend tools we use ourselves.

  • Canva’s Brand Kit feature: when centralised assets save more time than templates

    Canva’s Brand Kit feature: when centralised assets save more time than templates

    Canva's Brand Kit feature: when centralised assets save more time than templates
    Photo by Swello on Unsplash

    Most solo operators treat Canva like a template library. You find a design you like, swap in your text and images, export, and move on. But once you’re creating social graphics, lead magnets, and course slides every week, the template-first workflow breaks down—you’re re-entering hex codes, re-uploading logos, and hunting for that one font name you used last month.

    Canva’s Brand Kit feature solves this by centralising your visual identity in one place. Every colour, font, and logo you define in the Brand Kit syncs across all your designs. Change your primary colour once, and it updates everywhere. Upload a new logo version, and it’s available in every project without re-uploading.

    It sounds simple, but the time savings compound faster than most operators expect—and there are a few non-obvious quirks worth knowing before you commit your entire visual system to it.

    What Brand Kit actually stores

    Brand Kit isn’t just a folder. It’s a structured data layer that Canva injects into every design canvas you open. Specifically, it holds:

    • Colour palette — up to 12 colours on the free plan, unlimited on Pro. These appear as swatches in every colour picker.
    • Fonts — up to 3 font pairings (headline + body) on free, unlimited on Pro. Canva auto-suggests these when you add text boxes.
    • Logos — up to 3 logo files on free, 50+ on Pro. They appear in a dedicated “Your logos” panel, separate from your generic uploads.

    The key difference: Brand Kit assets are persistent across sessions and devices. Your uploaded images sit in your “Uploads” folder and can get buried. Brand Kit assets are always one click away, in the same spot, every time.

    When Brand Kit beats templates

    Templates are great for one-off designs or exploring new layouts. But if you’re running a content operation—weekly newsletters, daily social posts, monthly lead magnets—Brand Kit becomes the faster option once you cross a threshold:

    You’re creating 5+ designs per week. At that cadence, manually applying your brand colours and fonts wastes 2–3 minutes per design. Over a month, that’s an hour. Over a year, it’s 12+ hours of copy-pasting hex codes.

    You’re repurposing content across formats. If you turn a blog post into a carousel, an email header, and a Pinterest pin, Brand Kit ensures all three use the exact same blue (#2E5BFF, not #2E5CFF). Templates don’t enforce consistency—Brand Kit does.

    You rebrand or iterate your visual identity. Change your primary colour in Brand Kit, and every design you open from that point forward uses the new value. Templates don’t update retroactively—you’d need to manually edit every saved template file.

    The sync quirks nobody mentions

    Brand Kit syncs forward, not backward. If you update a colour in your Brand Kit, it won’t auto-update designs you’ve already published. You’ll need to re-open each old design, click the colour swatch, and re-apply the updated palette. This isn’t automatic.

    Font syncing is even less intuitive. If you remove a font from your Brand Kit, designs that used it will still render—but the font picker will stop suggesting it. If you then open that old design on a device where the font isn’t cached, Canva will substitute a fallback (usually Inter or Roboto). The result: your archived Instagram posts suddenly have the wrong typeface.

    Logo uploads have a resolution ceiling. Canva compresses uploads over 25 MB, and even on Pro, logo files over 100 MB will fail silently. If you’re working with print-quality vector files, export a web-optimised PNG or SVG at 2x your largest canvas size (usually 2000–3000px wide) before uploading.

    One non-obvious tip: use Brand Kit as a design system, not a brand bible

    Most operators set up Brand Kit once and never touch it. Better approach: treat it as a working palette that evolves with your content. If you’re testing a new accent colour for CTA buttons, add it to your Brand Kit temporarily. If it works, keep it. If not, remove it. The kit should reflect what you’re actually using in production, not what you decided in a brand workshop two years ago.

    One useful workflow: create a “seasonal” or “campaign” colour slot in your palette. Rotate it every quarter. This keeps your designs feeling fresh without requiring a full rebrand, and it gives you permission to experiment within a constrained system.

    If you’re creating more than a handful of designs per week, spend 10 minutes setting up your Brand Kit properly. Define your core colours, lock in your fonts, and upload logo variants (horizontal, stacked, icon-only). The upfront setup pays back in saved clicks within a month—and in visual consistency for as long as you keep publishing.

    Want more tool breakdowns like this? Subscribe to One Two Three Send for weekly deep-dives on the software solo operators actually use—no fluff, just the features that matter.

  • Most operators track too many social platforms—here’s the cutoff

    Most operators track too many social platforms—here’s the cutoff

    Most operators track too many social platforms—here's the cutoff
    Photo by Joel Rivera-Camacho on Unsplash

    The default advice for growing an online business is to be everywhere: Twitter, LinkedIn, Instagram, Threads, Bluesky, TikTok. Post daily. Engage relentlessly. Cross-promote.

    In practice, most solo operators and small teams spread themselves so thin across platforms that they can’t tell which channels actually deliver. They post sporadically, track inconsistently, and burn hours context-switching between apps with no clear return.

    The contrarian take: you should be active on two social platforms, maybe three. Any more than that and you’re optimizing for presence instead of results.

    The cost of multi-platform distribution

    Every platform you maintain has a real time cost. You need to:

    • Adapt content format and tone for each audience
    • Monitor replies, DMs, and mentions
    • Track referral traffic and conversions separately
    • Stay current on algorithm changes and feature rollouts
    • Manage posting schedules that don’t overlap poorly

    A single post on LinkedIn might take 10 minutes to write and format. The same core idea reshaped for Twitter threads, Instagram carousels, and TikTok scripts can easily consume two hours. If you’re posting three times a week across four platforms, that’s 24 hours a month just on content creation—before engagement, before analytics.

    And unlike email, where you own the relationship, social platforms can change reach overnight. You’re renting attention, and the lease terms shift without notice.

    How to pick your two platforms

    Start with where your revenue actually comes from. Open your analytics tool—Google Analytics, Fathom, Plausible, whatever you use—and filter traffic sources for the last 90 days. Look at:

    • Sessions from each social platform
    • Conversion rate (email signups, purchases, course enrollments)
    • Time on site—are visitors sticking around or bouncing?

    Most operators discover that 80% of their social-driven conversions come from one or two platforms. Often it’s LinkedIn for B2B, Twitter for tech audiences, or Instagram for visual products. The other four platforms deliver sporadic traffic that rarely converts.

    If you don’t have 90 days of data, run a 30-day test. Post consistently on your current platforms and track everything with UTM parameters (?utm_source=twitter&utm_medium=social&utm_campaign=july). The platform that delivers qualified traffic wins. The rest are candidates for shutdown.

    What about discovery and reach?

    The common objection: “But I need to be everywhere for discovery. What if my audience is on Platform X?”

    Discovery is overrated for most online businesses. If you’re running a newsletter, a course, or a productized service, your growth comes from being consistently valuable in one place, not sporadically present in six. A weekly LinkedIn post that gets 40 comments and five email signups beats a daily TikTok habit that generates 2,000 views and zero conversions.

    The operators who grow fastest pick one primary platform and one backup. Primary gets 70% of effort: original content, deep engagement, network building. Backup gets 30%: reposts, highlights, low-effort syndication. Everything else gets abandoned or automated into oblivion.

    Tools like Publer can help with cross-posting if you want a minimal presence elsewhere, but even then, you’re better off focusing energy than fragmenting it.

    When to add a third platform

    Add a third platform only when:

    • Your two primary channels consistently deliver 20+ conversions per month each
    • You have a specific, proven audience segment that only exists on the new platform
    • You can hire or delegate content creation so your personal time doesn’t increase

    Until then, double down on what works. A single platform with deep engagement and clear attribution beats shallow presence across the entire social web.

    If this resonated, subscribe to One Two Three Send—we cover the infrastructure and tooling decisions that actually move the needle for solo operators and small teams.

    Heads up — some links in this article are affiliate links. If you sign up through them, we may earn a small commission at no extra cost to you. We only recommend tools we use ourselves.

  • LinkedIn carousel PDFs get auto-compressed—here’s the resolution floor

    LinkedIn carousel PDFs get auto-compressed—here’s the resolution floor

    LinkedIn carousel PDFs get auto-compressed—here's the resolution floor
    Photo by Souvik Banerjee on Unsplash

    If you’ve uploaded a carousel PDF to LinkedIn and watched the text turn blurry or the charts pixelate, you’ve hit the platform’s automatic compression pipeline. LinkedIn doesn’t publish the exact spec, but testing across dozens of uploads reveals a consistent pattern: PDFs get resampled to a maximum width of 1080 pixels per slide, regardless of your original export resolution.

    That means exporting at 4K or even 2K is a waste of file size—and often makes compression worse, because LinkedIn’s algorithm has to work harder to downsample a massive file into its fixed output window.

    What LinkedIn’s compression pipeline actually does

    When you upload a multi-page PDF as a carousel post, LinkedIn converts each page into a raster image. The platform applies lossy JPEG compression at around 80–85% quality, then serves the result at a fixed width of 1080 pixels. Height scales proportionally, but the horizontal cap is hard.

    If your original PDF contains vector text or high-res images exported at 300 DPI and 3000 pixels wide, LinkedIn downsamples it. If you export at exactly 1080 pixels wide, LinkedIn still compresses it—but the quality loss is minimal, because there’s no resampling step.

    Text suffers most. Small sans-serif fonts at 10–12pt become fuzzy after downsample and compression. Charts with thin grid lines lose definition. Gradients band visibly.

    The export settings that survive compression

    After testing Canva, Figma, Adobe Illustrator, and Keynote exports, here’s what works:

    • Canvas size: 1080 × 1080 pixels for square carousels, or 1080 × 1350 pixels for portrait (4:5 ratio). LinkedIn supports both, but square is more common.
    • Export resolution: 72–150 DPI. Anything higher gets downsampled anyway. Save the file size.
    • Font size floor: 18pt minimum for body text, 24pt for headlines. Smaller than that and compression blur makes it hard to read on mobile.
    • Line weight: 2px minimum for borders, dividers, and chart axes. 1px lines disappear after compression.
    • Color mode: RGB, not CMYK. LinkedIn’s pipeline expects screen color space.

    If you’re exporting from Canva, choose “PDF Standard” rather than “PDF Print”—the print preset defaults to CMYK and 300 DPI, both of which get mangled. Figma users should export as PDF at 1× scale, not 2× or 3×.

    When compression visibly degrades your slides

    Three scenarios cause the worst quality loss:

    Screenshots of text. If you embed a screenshot of a tweet, email, or dashboard inside your carousel slide, and that screenshot contains small text, compression will blur it twice—once when you captured it, once when LinkedIn resamples the PDF. Better to recreate the layout with live text in your design tool.

    Gradients and soft shadows. Subtle gradients band into visible stripes after JPEG compression. Use solid fills or high-contrast gradients (light to dark, not light to slightly-less-light).

    Busy backgrounds. Textured or photographic backgrounds behind text create compression artifacts that make the text harder to read. Stick to solid colors or very simple geometric patterns.

    File size and upload speed

    LinkedIn’s upload interface accepts PDFs up to 100 MB, but anything over 5 MB takes noticeably longer to process—sometimes 30–60 seconds before the post preview renders. A ten-slide carousel exported at 1080px width and 72 DPI typically lands between 800 KB and 2 MB, which uploads and processes in under ten seconds.

    If your file is larger than 3 MB, check your export settings. You’re probably rendering at a higher resolution than LinkedIn can use, or embedding uncompressed images inside the PDF.

    Most design tools let you compress images before export. In Canva, this happens automatically when you choose “PDF Standard.” In Figma, use the “Flatten” option before exporting. In Illustrator, go to File → Save As → PDF, then set “Compression” to JPEG, Medium quality.

    One more thing: LinkedIn’s mobile crop

    Even if you export at 1080 × 1080, LinkedIn’s mobile app often crops the top and bottom edges of each slide in the feed preview. Users have to tap through to see the full slide. That means critical text—headlines, CTAs, key data points—should sit in the center 80% of the canvas, not near the edges.

    Test your carousel by uploading it as a draft post, then viewing it on your phone before publishing. If your headline gets cut off in the preview, move it down.

    Want more tool-specific breakdowns like this? Subscribe to One Two Three Send—one operator-to-operator article every day, no fluff.

  • Social media embeds slow page load by 2–4 seconds—here’s the fix

    Social media embeds slow page load by 2–4 seconds—here’s the fix

    Social media embeds slow page load by 2–4 seconds—here's the fix
    Photo by Aman Pal on Unsplash

    Every time you paste a tweet, Instagram post, or Facebook update into your blog, you’re handing a third-party script control over your page speed. The average social media embed adds 400–800 KB of JavaScript, plus external font files, tracking pixels, and iframe overhead. For a solo operator running a content site, that’s the difference between a 1.2-second load time and a 4-second slog that kills SEO and conversions.

    The problem isn’t the content—it’s how the platforms deliver it. Social embeds don’t just pull in the post you want. They load entire widget libraries designed for scale and tracking, not performance.

    What social embeds actually load

    When you embed a single tweet using Twitter’s standard embed code, the browser downloads:

    • Twitter’s widgets.js library (approximately 450 KB)
    • Additional stylesheets and fonts (150–200 KB)
    • Tracking scripts for analytics and ad attribution
    • An iframe that makes separate requests back to Twitter’s CDN

    Instagram is worse. A single Instagram embed can trigger 600–900 KB of assets, including the embed.js library, multiple CSS files, and high-resolution image variants you never asked for.

    Facebook’s embed SDK comes in around 350 KB but adds the Social Plugin framework even if you’re only showing one post. If you embed content from multiple platforms on the same page, you’re stacking these libraries—each one blocking or delaying your actual content from rendering.

    Lazy-loading: load embeds only when visible

    The fix is lazy-loading: defer loading the embed scripts until the user scrolls near them. Most visitors never scroll to the bottom of a 2,000-word post, so there’s no reason to load a tweet that sits in paragraph 47.

    Lazy-loading cuts initial page weight and speeds up Time to Interactive, the metric Google uses for Core Web Vitals scoring. Here’s how to implement it without a plugin.

    Replace the platform’s default embed code with a static placeholder—a screenshot or a styled <blockquote> with the post text. Wrap it in a <div> with a unique class like lazy-embed. Then add this JavaScript snippet to your site:

    const embedObserver = new IntersectionObserver((entries) => {
      entries.forEach(entry => {
        if (entry.isIntersecting) {
          const script = document.createElement('script');
          script.src = entry.target.dataset.embedSrc;
          document.body.appendChild(script);
          embedObserver.unobserve(entry.target);
        }
      });
    });
    document.querySelectorAll('.lazy-embed').forEach(el => embedObserver.observe(el));

    Store the original embed script URL in a data-embed-src attribute on your placeholder div. When the user scrolls within 200 pixels of the embed, the Intersection Observer fires, loads the script, and the platform renders the live embed.

    Static fallbacks for critical embeds

    Lazy-loading works for supplementary content—testimonials, example posts, or visual flair. But if the embed is the content (a Twitter thread you’re analyzing line-by-line, or an Instagram carousel you’re critiquing), lazy-loading breaks the reading experience.

    In those cases, use a static fallback that doesn’t require JavaScript at all. Copy the post text into a <blockquote>, include a linked timestamp to the original, and host a screenshot as a fallback image. You lose the interactive widget, but you keep the content accessible and fast.

    This approach also future-proofs your archive. When Twitter rebrands, Instagram changes its embed API, or Facebook deprecates a plugin version, your static fallback still renders. I’ve seen three-year-old posts where the live embed returns a 404, but the blockquote text and screenshot preserve the original context.

    WordPress plugins and platform support

    If you’re on WordPress, the Lazy Load for Social Embeds plugin handles Twitter, Instagram, YouTube, and Facebook automatically. It replaces oEmbeds with placeholders and triggers the real embed on scroll. No custom code required.

    For builders using static site generators (Eleventy, Hugo, Next.js), write a shortcode or component that outputs the placeholder markup and includes the lazy-load observer script once per page. Keep the observer logic in a separate file so it’s cached and reused across posts.

    One non-obvious tip: set the Intersection Observer’s rootMargin to '200px' so embeds start loading slightly before they enter the viewport. This gives the script time to fetch and render before the user actually sees the placeholder, making the transition feel instant.

    If you run a content site with more than a dozen posts that include social embeds, audit your heaviest pages with Chrome DevTools or WebPageTest. Check the Network tab filtered by third-party domains. You’ll see exactly how much weight each platform adds—and how much faster your site loads when you defer it.

    Have a page-speed question or a tool you want explained? Reply to this email—we pick reader questions for Sunday’s Q&A.

  • Social media scheduling APIs break drafts—here’s what gets lost

    Social media scheduling APIs break drafts—here’s what gets lost

    Social media scheduling APIs break drafts—here's what gets lost
    Photo by Walls.io on Unsplash

    Social media scheduling tools promise seamless queue management across platforms. But if you’re building custom workflows—Zapier automations, Make scenarios, or direct API integrations—you’ll quickly discover that “draft” doesn’t mean the same thing to every tool.

    Most social schedulers expose a publish endpoint and a queue endpoint. What they don’t expose cleanly: draft state, revision history, or partial edits. When you push a post via API, it’s either scheduled or it’s not. The in-between states that exist in the web UI often vanish when you automate.

    What draft state actually means

    In most scheduling tools, a draft is a post that exists in the database but hasn’t been assigned a publish time. It’s a holding area. You can edit it, attach media, add tags, then decide later whether to schedule or delete it.

    But APIs don’t mirror this workflow. Most tools require you to pass a scheduled_at timestamp when you create a post via API. If you don’t, the post either publishes immediately or throws an error. There’s no “save this as a draft and let me come back to it” option.

    Publer is one exception—it allows null scheduling via API and treats those posts as drafts. But even there, you can’t retrieve draft metadata like “last edited by” or “created from automation.” The web UI shows that context; the API doesn’t return it.

    What breaks when you automate

    Here’s a common workflow: you use an AI tool to generate social copy variations, push them to your scheduler as drafts, then manually review and approve each one before it goes live.

    If your scheduler’s API doesn’t support true draft state, you’re forced to pick a workaround:

    • Schedule everything far into the future (e.g., December 31, 2030), then manually move posts forward. This clutters your queue and makes it hard to see what’s actually scheduled.
    • Store drafts in a separate tool (Notion, Airtable, a Google Sheet), then manually copy-paste into your scheduler. This defeats the purpose of automation.
    • Push directly to the platform API (Twitter, LinkedIn, Instagram) and skip the scheduler entirely. This works, but you lose centralized analytics and multi-platform posting.

    None of these are clean. All of them add friction back into a workflow you were trying to automate.

    Which tools handle drafts cleanly

    I tested five popular schedulers to see which ones preserve draft state when you create posts via API:

    • Publer: Full draft support. You can POST to /posts with no date field, and it saves as a draft. You can retrieve drafts via GET and update them later.
    • Buffer: No draft support. Every API call requires scheduled_at or the post publishes immediately. The web UI has a drafts tab, but you can’t create drafts programmatically.
    • Later: Partial support. You can create “unpublished” posts, but they’re tied to a specific calendar slot. Moving them requires a separate PATCH request, and there’s no way to bulk-retrieve unpublished items.
    • Hootsuite: No API access to drafts. You can create scheduled posts, but anything without a timestamp is rejected.
    • Metricool: Similar to Buffer—scheduled or live, no in-between.

    If draft state matters to your workflow, Publer is the only tool in this group that treats it as a first-class API feature.

    How to route around it

    If you’re locked into a scheduler that doesn’t support drafts via API, here’s what works:

    Use a staging tag. Create a unique tag like draft-pending and attach it to every post you create programmatically. Schedule everything for a distant date, filter your queue by tag, and batch-review. When you approve a post, remove the tag and reschedule it.

    Build a lightweight draft layer. Store draft content in Airtable or Notion, mark each row as “approved” or “pending,” then trigger a Zapier or Make automation that only schedules posts marked approved. This adds a table to maintain, but it gives you full control over state.

    Use webhooks to pull, not push. Instead of pushing drafts into your scheduler, set up a webhook that fires when you mark a draft “ready” in your CMS or AI tool. The webhook calls your scheduler’s API at that moment—no orphaned drafts, no clutter.

    None of these are as clean as native draft support, but they’re predictable and won’t break when your scheduler updates its API.

    What to ask before you automate

    Before you wire up a social scheduling automation, check the API docs for these three things:

    • Can I create a post without a scheduled_at timestamp?
    • Can I retrieve posts that haven’t been scheduled yet?
    • Can I update a draft after creation without republishing it?

    If the answer to any of those is no, plan your workaround before you build. Draft state isn’t a nice-to-have—it’s the difference between a smooth review process and a queue full of junk you can’t easily filter.

    Want more tooling breakdowns like this? Reply and tell me which API quirks cost you the most time—I’ll cover it in a future piece.

    Heads up — some links in this article are affiliate links. If you sign up through them, we may earn a small commission at no extra cost to you. We only recommend tools we use ourselves.

  • Stop chasing vanity followers—audience size matters less than you think

    Stop chasing vanity followers—audience size matters less than you think

    Stop chasing vanity followers—audience size matters less than you think
    Photo by Adis Colic on Unsplash

    The standard advice for growing an online business sounds obvious: build a bigger audience. More followers means more reach. More reach means more revenue. Except the data from actual operators running content businesses tells a messier story.

    A creator with 50,000 Instagram followers and 2% engagement reaches 1,000 people per post. Another with 5,000 followers and 20% engagement reaches the same number. The difference? The second operator knows exactly who those 1,000 people are, what they need, and how to sell to them.

    Vanity metrics—follower counts, subscriber numbers, page views—dominate because they’re easy to track and easy to brag about. But they correlate poorly with the numbers that actually matter: conversion rate, average order value, and lifetime customer value.

    The revenue math breaks at scale

    Take two newsletter operators. Operator A has 25,000 subscribers, a 22% open rate, and a 0.8% click-through rate to paid products. That’s 5,500 opens and 44 clicks per send. If 10% of those clicks convert at a $50 average order value, that’s $220 per email.

    Operator B has 3,000 subscribers, a 45% open rate, and a 4% click-through rate. That’s 1,350 opens and 54 clicks. Same 10% conversion at $50 gets $270 per send—more revenue from an audience one-eighth the size.

    The difference isn’t luck. Operator B likely built their list through a narrow lead magnet, sends to a segmented audience, and writes for a specific person solving a specific problem. Operator A probably grew through viral content, giveaways, or bundled list swaps—all of which inflate numbers while diluting intent.

    This pattern holds across platforms. A YouTube channel with 8,000 subscribers in a tight niche—say, Webflow automation for agencies—will often out-earn a generalist productivity channel with 80,000 subscribers. Sponsorship rates follow engagement and audience fit, not raw numbers. Affiliate conversions come from trust, not impressions.

    Smaller audiences cost less to serve

    Once you pass certain thresholds, audience growth becomes expensive. Email platforms tier pricing by subscriber count: MailerLite charges $9/month for up to 1,000 subscribers and $18/month for 2,500. Beehiiv‘s Scale plan starts at $42/month for up to 10,000 subscribers but jumps to $84/month at 25,000.

    If half your list is unengaged—people who subscribed once and never opened again—you’re paying to store dead weight. A 10,000-subscriber list with 50% engagement costs the same as a 5,000-subscriber list with 100% engagement, but the latter generates better deliverability, higher open rates, and more revenue per send.

    The same logic applies to hosting and infrastructure. A site with 100,000 monthly visitors and a 0.5% conversion rate needs more server resources than a site with 10,000 visitors and a 5% conversion rate. The first pays for CDN bandwidth, caching layers, and database overhead to serve traffic that never converts. The second runs on a $30/month managed WordPress host and spends the savings on better content.

    Focus on density, not scale

    If vanity metrics don’t predict revenue, what does? Audience density: the percentage of your audience that knows what you do, trusts your recommendations, and has a problem you can solve.

    High-density audiences come from narrow positioning. Instead of “productivity tips for entrepreneurs,” try “workflow automation for solo SaaS founders.” Instead of “social media strategy,” try “LinkedIn content systems for B2B consultants.” The tighter the niche, the higher the intent, and the easier it is to convert attention into revenue.

    Prune your list regularly. If someone hasn’t opened an email in six months, remove them or send a re-engagement campaign. Most platforms let you suppress or delete unengaged subscribers—do it. Your open rates will climb, your sender reputation will improve, and your cost per engaged subscriber will drop.

    Track revenue per subscriber or revenue per follower as a north-star metric. If you have 5,000 newsletter subscribers and generate $2,000/month from that list, you’re earning $0.40 per subscriber per month. That number matters more than whether your list grows to 6,000 or 10,000 next quarter. If revenue per subscriber stays flat or declines as you grow, your acquisition strategy is broken.

    When size actually matters

    Audience size isn’t irrelevant—it’s just overrated. There are a few scenarios where raw numbers unlock real opportunities:

    • Sponsorship deals: Some advertisers set hard minimums—10,000 email subscribers or 50,000 social followers—before they’ll negotiate. If sponsorship revenue is your primary model, you’ll need to hit those thresholds.
    • Platform algorithms: YouTube, Instagram, and TikTok reward consistency and volume. A larger back catalog and higher follower count can improve distribution, but only if engagement rates stay healthy.
    • Media credibility: Journalists and podcast bookers still use follower counts as a rough credibility signal. A 20,000-subscriber newsletter gets more inbound PR opportunities than a 2,000-subscriber one, even if the smaller list has better engagement.

    But in each case, size is a threshold or a signal—not the thing that generates revenue. Once you clear the minimum, density and conversion mechanics matter more.

    If you’re optimizing for the wrong metric, reply and tell me which one you’re stuck on. I’ll feature the best answers in a future Q&A piece.

    Stop counting followers. Start counting dollars per follower.

    Heads up — some links in this article are affiliate links. If you sign up through them, we may earn a small commission at no extra cost to you. We only recommend tools we use ourselves.

  • Social platform APIs throttle read requests faster than writes

    Social platform APIs throttle read requests faster than writes

    Most solo operators automate social posting without realizing that fetching data from social platforms burns through API quotas two to five times faster than publishing content. If you’re building workflows that pull engagement metrics, follower lists, or historical posts, you’ll hit rate limits long before your posting automation breaks.

    This asymmetry isn’t accidental. Platforms want you to publish—it’s free content for them. But reading data at scale lets you build competing analytics products, scrape competitor insights, or export your audience. So they throttle reads aggressively.

    How the limits actually break down

    Twitter’s free API tier gives you 10,000 read requests per month but allows 50,000 tweets. LinkedIn’s API (available only to approved partners) caps profile lookups at 100 per day, while post publishing has no hard daily cap for most use cases. Instagram’s Graph API allows 200 read calls per hour but handles significantly more media uploads in the same window.

    The result: you can schedule a month of posts without trouble, but a single workflow that checks your last 500 tweets for engagement stats will exhaust your quota in an afternoon.

    Publer and similar social schedulers stay within limits by caching aggressively and batching requests. If you’re building custom automation with Make or Zapier, you don’t get that layer of protection by default.

    Where automation workflows break first

    The most common failure point is analytics dashboards. A Zap that pulls yesterday’s top posts from three platforms, calculates engagement rates, and logs them to a Google Sheet will chew through 90–150 API calls per run. Do that daily, and you’re at 2,700–4,500 calls per month—just from one simple report.

    Another trap: workflows that check if a post exists before publishing a duplicate. Every existence check is a read. If you’re cross-posting the same content to Twitter, LinkedIn, and Facebook, and each platform requires a lookup to confirm the post isn’t already live, you’ve tripled your read quota burn for no publishing benefit.

    Follower-sync workflows hit limits fastest. Pulling your full follower list from LinkedIn every week to update a CRM costs 100+ calls per run if you have a few thousand connections. Do it weekly, and you’re over budget in a month.

    How to route around the limits

    Cache everything you can locally. If you need engagement data for analysis, pull it once per week and store it in Airtable, Notion, or a Google Sheet. Run reports against your own data, not the live API.

    Batch your reads. Instead of checking post performance every time you publish, schedule one daily or weekly job that fetches all recent posts in a single pass. You’ll use 7–30 calls per month instead of 200+.

    Use webhooks when platforms offer them. Facebook and Instagram can push post insights to your server when events happen, eliminating the need for polling. Twitter’s webhook support is limited, but if you’re on a paid tier, it’s worth the setup cost.

    For follower syncs, only pull deltas. Most APIs let you request changes since a timestamp. If you’re tracking new followers, ask for additions since your last check instead of re-fetching the entire list.

    When to pay for higher limits

    Twitter’s Basic tier costs $100/month and raises read limits to 10,000 per month at the app level—but it’s still far below what you’d need for daily analytics across multiple accounts. The real break-even comes if you’re running client work or managing five-plus brands. At that scale, a single shared automation hitting limits blocks everyone.

    LinkedIn doesn’t sell API access directly to solo operators. You’ll need to partner with an approved vendor or use a tool like Shield Analytics, which costs $20–50/month and includes pre-built rate-limit management.

    For Instagram, the Graph API is free but requires a Facebook Business account and app review. If you’re just scheduling posts, stick with a tool that’s already approved. If you’re building custom dashboards, expect to spend a week on the approval process and another week handling edge cases when the API changes.

    Most operators don’t need higher limits—they need smarter workflows. If you’re burning through read quotas, audit your Zaps or Make scenarios for redundant lookups, and switch to a weekly batch job. You’ll stay under free-tier caps and spend your time on content, not API accounting.

    One Two Three Send covers automation, APIs, and workflow design for solo operators every week. Subscribe here to get the next deep-dive in your inbox.

    Heads up — some links in this article are affiliate links. If you sign up through them, we may earn a small commission at no extra cost to you. We only recommend tools we use ourselves.