Category: Monetisation

  • Course platforms leak money through hidden transaction limits

    Course platforms leak money through hidden transaction limits

    Most course creators pick a platform, upload their videos, and assume the checkout will work at any scale. Then they run a launch, hit a transaction threshold buried in the fine print, and watch sales freeze until the next billing cycle.

    These limits aren’t about storage or bandwidth—they’re about how many individual purchases your platform will process in a calendar month. Cross the line and you’re either locked out, auto-upgraded to a higher tier, or hit with overage fees that can double your hosting cost overnight.

    Where the walls are

    Teachable’s Basic plan ($59/month) caps you at 250 transactions per month. That’s total checkouts: course sales, upsells, payment-plan installments. If you sell a $97 course and 260 people buy it in October, the last ten get an error page unless you’re already on the Pro plan ($159/month), which raises the ceiling to 2,000 transactions.

    Thinkific’s Basic plan ($49/month) has no stated transaction cap, but it restricts you to one published course and one admin user. You hit scaling friction through feature gates, not checkout limits. The Start plan ($99/month) lifts most restrictions but still charges a $0.10 fee per enrollment if you use Thinkific Payments instead of connecting Stripe directly.

    Podia bundles email, courses, and digital downloads under one roof. Its Mover plan ($39/month) has no transaction cap and no platform fees—but you’re limited to one site and basic email automation. The Shaker plan ($89/month) adds affiliates, code editors, and advanced workflows, still with no transaction ceiling.

    Kajabi doesn’t publish a transaction limit, but its entry-tier pricing starts at $149/month for up to 10,000 contacts and 1,000 active members. You’re more likely to hit a contact-list cap than a sales cap, but both can shut down growth mid-funnel.

    What actually breaks

    Transaction limits don’t just stop new sales—they cascade. If you’re running a payment plan (three installments over 90 days), each installment counts as a separate transaction. A single buyer on a payment plan consumes three transaction slots, even though you only made one sale.

    Upsells and order bumps multiply the count too. Sell a course with a one-click upsell for templates, and that’s two transactions per buyer. Run a launch weekend with 200 buyers, half of whom take the upsell, and you’ve burned 300 transactions in 72 hours.

    Affiliate payouts don’t count toward transaction limits, but refunds do. Issue a refund in Teachable and it doesn’t refund your transaction count—you’ve still used the slot. If you’re near your cap and process ten refunds, those ten slots are gone until next month.

    How to plan around it

    Before you launch, calculate your expected transaction load. Multiply projected buyers by the number of transaction events per buyer: initial purchase, upsells, and any payment-plan installments. Add 20% margin for refunds and edge cases.

    If your platform caps transactions, map your pricing tier against your funnel. Teachable’s Pro plan at $159/month makes sense if you expect 500–2,000 transactions per month. Below that, you’re overpaying. Above that, you need the next tier or a migration plan.

    For payment plans, front-load as much revenue as possible. Offer a small discount for paying in full, or structure plans as two installments instead of three. Fewer installments mean fewer transaction events and more predictable capacity.

    Connect Stripe or PayPal directly when the platform allows it. Thinkific, Podia, and Teachable all support direct payment gateways, which often bypass per-transaction fees and give you more control over dispute handling and payout timing.

    When to switch platforms

    If you’re consistently hitting transaction caps, moving to a platform with no ceiling—or migrating to a self-hosted solution like WooCommerce or MemberPress—becomes cheaper than upgrading tiers every quarter.

    Self-hosting adds operational overhead: you’re responsible for uptime, PCI compliance (handled by Stripe, but you still configure it), and plugin updates. But you eliminate per-transaction fees and artificial caps. A $30/month WordPress host plus a $199/year membership plugin can handle 10,000 transactions a month without flinching.

    Before you migrate, export everything: customer lists, transaction history, course content, email sequences. Most platforms let you export CSVs and download video files, but automation rules and custom CSS don’t transfer cleanly. Budget two weeks for a clean migration, longer if you have complex funnels.

    If you’re planning a launch in the next 60 days, check your transaction cap today. Open your billing page, find the limit, and multiply your projected sales by the number of transaction events per buyer. If the math puts you within 20% of the cap, upgrade now—or risk going dark the day your launch peaks.

    Hit reply if you’ve been burned by a transaction cap mid-launch. I’m collecting war stories for a follow-up piece on platform migration triggers.

  • Beehiiv’s paid subscriptions: setup, fees, and the VAT surprise

    Beehiiv’s paid subscriptions: setup, fees, and the VAT surprise

    Beehiiv launched native paid subscriptions in 2023, positioning itself as the all-in-one platform that doesn’t need Stripe integration or third-party membership plugins. For operators already using Beehiiv for free newsletters, flipping the paid switch looks frictionless. But the setup hides complexity that surfaces once you start collecting money across borders.

    Here’s what actually happens when you turn on paid subscriptions, what it costs, and the tax issue that catches most operators off guard.

    How Beehiiv paid subscriptions work

    Beehiiv handles payment processing, subscriber management, and content gating in one interface. You set your price—monthly, annual, or both—and designate which posts are free versus paid. Beehiiv uses Stripe under the hood but abstracts the integration: you connect your Stripe account once during setup, and Beehiiv manages checkout, invoicing, and failed payment recovery.

    The platform supports tiered pricing, free trials, and discount codes. You can also gate individual posts retroactively, which is useful if you’re testing paid content before fully committing to a subscription model.

    One non-obvious benefit: Beehiiv’s referral program integrates with paid tiers. If a free subscriber refers enough readers, they can unlock paid content without paying. This works well for growth-focused operators who want to reward evangelists, but it complicates revenue forecasting—your paid subscriber count and MRR won’t always move in lockstep.

    The fee structure

    Beehiiv takes a 2.9% platform fee on top of Stripe’s standard processing fees (2.9% + $0.30 per transaction in the U.S.). That means you’re paying roughly 5.8% + $0.30 per transaction when someone subscribes.

    For a $10/month subscription, you net around $9.12 after fees. At $100/month, you keep $94.12. The percentage hit is consistent, but the flat $0.30 fee stings more on lower-price subscriptions.

    Beehiiv’s fee applies to your plan tier, not your revenue size. Whether you’re on the Scale plan ($99/month) or Launch (free), the 2.9% fee remains. This is different from platforms like Substack, which take 10% but don’t charge a base platform fee.

    If you process $5,000/month in subscriptions, Beehiiv’s cut is $145. Substack’s would be $500. The breakeven point sits around $3,500/month in subscription revenue—below that, Beehiiv’s model costs less; above it, the flat percentage wins.

    The VAT problem nobody mentions upfront

    Beehiiv does not automatically handle VAT, GST, or sales tax collection for non-U.S. subscribers. If you have paying subscribers in the EU, UK, Australia, or other VAT-registered regions, you are responsible for compliance.

    Stripe can calculate and remit taxes if you enable Stripe Tax, but Beehiiv’s integration doesn’t surface this option in the dashboard. You have to configure it directly in your Stripe account, then ensure Beehiiv passes the correct billing address data to Stripe during checkout.

    Most operators discover this after their first invoice from a European subscriber. If you’re not charging VAT and you cross registration thresholds (€10,000 in EU sales), you’re technically operating outside compliance. Fixing it retroactively means either absorbing the tax yourself or awkwardly re-invoicing subscribers.

    If you’re U.S.-based and expect most subscribers to be domestic, this may not matter in year one. But if you’re writing for a global audience, budget time to either enable Stripe Tax or work with an accountant who understands digital service VAT rules.

    When to use Beehiiv paid vs. an external membership tool

    Beehiiv’s native subscriptions work best when:

    • Your entire business is the newsletter—no courses, downloads, or community access
    • You want one dashboard for content, audience, and revenue
    • You’re okay with Beehiiv owning the checkout experience and subscriber relationship

    Skip Beehiiv paid and use a dedicated membership platform (Memberful, Ghost, or a WordPress membership plugin) if:

    • You need complex access rules—time-limited content, drip courses, or tiered community access
    • You want full control over tax settings, invoicing, and subscriber data portability
    • You plan to sell more than just newsletter access (e.g., templates, coaching, or archived resources)

    Beehiiv’s model is fast to launch but rigid once you outgrow simple “free vs. paid” segmentation. Migrating paying subscribers off the platform later is possible, but it requires CSV exports, manual Stripe imports, and subscriber communication to avoid confusion or churn.

    If you’re testing paid for the first time and already use Beehiiv, the native option is the fastest validation path. Just know the tax setup isn’t automatic, and the 2.9% fee is a permanent cost unless you move to a different platform.

    Using a different newsletter platform or thinking about switching? Reply and let me know what’s working—or not—in your paid subscription stack. I’ll cover more monetization mechanics in future issues.

    Heads up — some links in this article are affiliate links. If you sign up through them, we may earn a small commission at no extra cost to you. We only recommend tools we use ourselves.

  • Affiliate link cloaking: compliance, tracking, and when to skip it

    Affiliate link cloaking: compliance, tracking, and when to skip it

    Affiliate link cloaking—redirecting yoursite.com/go/product to partnersite.com/?ref=yourID—sounds like good housekeeping. Cleaner URLs, consistent branding, easier tracking. But it introduces technical risk, compliance obligations, and platform dependency that many operators don’t plan for.

    Here’s what actually changes when you cloak links, and when you’re better off leaving them naked.

    What cloaking does (and doesn’t) solve

    Link cloaking replaces long, ugly affiliate URLs with short, branded redirects. Instead of sharing https://convertkit.com?lmref=abc123xyz, you serve yoursite.com/convertkit and 301-redirect behind the scenes.

    The benefit is consistency. Readers see your domain. You can swap the destination URL without editing published content. You centralize click tracking in one place—your own server logs or a plugin like Pretty Links or ThirstyAffiliates.

    What it doesn’t do: improve deliverability, hide the affiliate relationship from networks, or make the link more trustworthy. Email clients still see the final destination after following the redirect. Affiliate networks log the same click. Readers who hover still see the redirect if they check the status bar.

    And you’ve added a round-trip dependency: your server must respond before the affiliate network sees the click. If your host is slow, you’ve introduced latency. If your site goes down, the link breaks entirely.

    FTC disclosure and platform terms

    Cloaking doesn’t exempt you from disclosure rules. The FTC’s Endorsement Guides require clear, conspicuous notice when you earn from a recommendation. A short slug like /go/ or /recommends/ signals commercial intent, but it’s not a substitute for plain-language disclosure near the link.

    Some affiliate programs explicitly prohibit cloaking. Amazon Associates’ Operating Agreement bans link shortening or masking that obscures the final destination. Commission Junction and ShareASale allow it, but require that the redirect preserves tracking parameters and doesn’t mislead users.

    Check your agreement before you automate. Violating terms can mean forfeited commissions or account closure, and most networks won’t warn you—they’ll just stop paying.

    When cloaking makes sense

    If you publish across multiple platforms—blog, newsletter, podcast show notes—and want consistent analytics, cloaking centralizes your data. You can see aggregate clicks in one dashboard instead of stitching together reports from five affiliate portals.

    If you rotate offers or test different partners, cloaking lets you update the destination without republishing old content. A post from 2023 can point to a new tool in 2026 if the /email-tool slug stays the same.

    If you’re building a resource hub or comparison page, branded slugs make the link structure easier to maintain. /bluehost, /siteground, and /bigscoots are more memorable than tracking IDs.

    When to leave links uncloaked

    In email, cloaking adds a redirect that some inbox providers flag. Mailchimp, ConvertKit, and MailerLite preserve click tracking without requiring your own redirect layer. Adding a second hop can increase latency or trigger spam filters if your domain reputation is newer than the affiliate network’s.

    If you’re solo and publishing sporadically, the maintenance overhead isn’t worth it. Cloaking plugins need updates. Redirects need testing. If a slug breaks and you don’t notice for two months, you’ve lost clicks and trust.

    If the affiliate program forbids it, don’t bother trying to hide the relationship. Amazon’s SiteStripe links work fine as-is. Trying to mask them risks more than you gain.

    And if you’re linking to a brand readers already recognize—Stripe, Shopify, Adobe—there’s no branding advantage. stripe.com is more trustworthy than yoursite.com/stripe to someone who’s never heard of you.

    Implementation trade-offs

    WordPress plugins like Pretty Links and ThirstyAffiliates handle the redirect and log clicks in your database. Easy to set up, but you’re querying your own database on every click. High-traffic affiliates can strain shared hosting if you’re not caching redirects.

    Link management tools like Rebrandly or Short.io offload the redirect to their infrastructure. Faster, more reliable, but you’re paying monthly and trusting a third party with your click data. If they change pricing or shut down, you’re migrating hundreds of links.

    Server-level redirects—defined in .htaccess or Nginx config—are fastest and least fragile, but require manual editing every time you add a link. Fine if you have six evergreen affiliate relationships. Unworkable if you’re testing new offers weekly.

    Pick the method that matches your volume and technical comfort. If you’re managing fewer than 20 affiliate links, a plugin is fine. If you’re running a deals site with 200+ partners, invest in dedicated infrastructure or a SaaS redirect service.

    Got a question about affiliate operations, tracking, or compliance? Reply to this email—operator stories make the best future articles.

  • Gumroad’s variant pricing: when to use it and when it confuses buyers

    Gumroad’s variant pricing feature lets you offer multiple versions of the same product—different formats, license tiers, or access levels—without duplicating product pages. A single URL can serve a $9 PDF, a $49 video bundle, and a $199 commercial license.

    The mechanic is simple: buyers see a dropdown or radio buttons before checkout. Pick a tier, click buy, done.

    In practice, it’s more nuanced than that. Variants can increase average order value when implemented well, or create decision paralysis when overdone. The difference comes down to how you structure the choice and what you’re actually selling.

    How Gumroad’s variant pricing actually works

    When you create a product in Gumroad, you can add variants under the pricing section. Each variant gets its own name, price, and optional description. You can also attach different files to each variant—so a “basic” tier delivers a PDF, while a “pro” tier adds video files and templates.

    Gumroad handles fulfillment automatically. The buyer selects a variant, pays, and receives only the files attached to that specific option. You’re not manually sorting orders or sending different download links.

    The feature supports up to 100 variants per product, though you’ll never need that many. Most successful Gumroad creators use two to four.

    Variants appear on your product page as a selection interface. You control the display style—dropdown menu, radio buttons, or cards with images. The card layout works best for visual products where the difference between tiers is obvious at a glance (e.g., template packs with different color schemes). Radio buttons work for straightforward upgrades like “personal use” vs. “commercial license.”

    When variants increase revenue

    Variants perform well when the upgrade path is clear and the value gap is obvious. A few patterns that work:

    License tiers. Selling design assets, templates, or stock content? Offer a personal-use license at $19 and a commercial license at $79. The buyer self-selects based on need, and you capture budget from both hobbyists and agencies without splitting your audience across multiple product pages.

    Format bundles. If you’re selling educational content, offer the written guide alone, then add video walkthroughs or editable templates at higher tiers. The base product proves value; the upgrades save time. A $29 PDF guide might convert at 4%, while adding a $79 “PDF + videos” variant brings total revenue up 30% even if only 15% of buyers choose it.

    Quantity-based pricing. This works for freelancers selling assets in packs. Ten social media templates for $15, fifty templates for $49. The per-unit savings are obvious, and buyers with larger needs convert themselves into higher-value customers.

    The key commonality: the base variant is a complete, valuable product. The upgrades are enhancements, not necessities. If the cheapest option feels incomplete, you’ve built a paywall, not a product ladder.

    When variants create friction instead

    Too many options kill conversions. If a buyer lands on your product page and sees seven variants with unclear differences, they’ll leave to “think about it”—which means they won’t come back.

    Avoid variants when:

    • The differences are cosmetic or arbitrary. Offering the same ebook in three different PDF layouts doesn’t add value; it adds confusion. Consolidate.
    • You’re trying to price-discriminate without clear tiers. Listing a product at $9, $12, $15, and $19 with vague labels like “supporter pricing” doesn’t work. Buyers assume the $9 version is incomplete or lower quality. If you want to let people pay more, use Gumroad’s “pay what you want” feature with a suggested price instead.
    • Your audience doesn’t understand the distinction. Selling “standard resolution” vs. “high resolution” images? Great if you’re targeting designers. Confusing if your buyers are small-business owners who don’t know what DPI means. Meet your audience where they are.

    One variant mistake I see often: “basic,” “pro,” and “ultimate” tiers where the feature list for each is buried in fine print. If someone has to read three paragraphs to understand what they’re buying, simplify the structure or split into separate products.

    The non-obvious tip: test your variants with SKU tracking

    Gumroad doesn’t surface variant-level analytics in the main dashboard. You see total sales and revenue, but not a breakdown of which variant is actually driving volume.

    Workaround: treat each variant as its own SKU in your spreadsheet or analytics tool. Export your sales CSV monthly, filter by variant name, and track conversion rate and revenue independently. You’ll often find that one variant accounts for 70% of revenue while another sits unused. That’s actionable data—either kill the underperformer or reframe it.

    If you’re running paid traffic to a Gumroad product, append UTM parameters to your links and cross-reference them with variant sales in your export. You’ll see which traffic sources prefer which tiers, and you can adjust your ad creative accordingly. A Facebook ad highlighting affordability might drive base-tier sales, while a Twitter thread showcasing advanced features could skew toward your top variant.

    Gumroad’s variant pricing works best when it reduces decision fatigue rather than creating it. Two or three well-differentiated options, clear value at every level, and a single product page that doesn’t require a comparison chart to navigate. Get that right, and you’ll see higher average order values without fragmenting your catalog.

    Using Gumroad for your digital products, courses, or templates? Reply with your toughest pricing question—I’ll cover it in a future issue.

  • Stripe’s tax automation: how it works and when to turn it on

    Stripe’s tax automation: how it works and when to turn it on

    If you’re selling digital products, courses, or memberships, you’ve probably stared at Stripe’s Tax settings and wondered whether clicking “enable” would solve your compliance headaches or create new ones.

    Stripe Tax is a feature that calculates, collects, and (optionally) files sales tax, VAT, and GST on your transactions. It’s built into Stripe, so there’s no separate integration to maintain. But it’s not free, and it’s not always the right move.

    Here’s how it actually works, what it costs, and when you should turn it on—or leave it off.

    What Stripe Tax actually does

    Stripe Tax hooks into your payment flow and calculates the correct tax rate based on your customer’s location and what you’re selling. It supports over 40 countries and automatically updates rates when local laws change.

    When a customer checks out, Stripe adds the appropriate tax to the transaction total. That tax gets collected alongside the payment, and Stripe holds it separately from your payout balance.

    If you enable the filing service (called Stripe Tax Registration and Filing), Stripe will register your business in the jurisdictions where you hit economic nexus thresholds, file returns on your behalf, and remit the tax directly to the tax authorities.

    It covers VAT in the EU, UK, and other countries, GST in Australia, Canada, New Zealand, and Singapore, plus sales tax across U.S. states. It does not cover income tax, withholding tax, or import duties.

    Pricing: the cost structure you need to know

    Stripe Tax costs 0.5% of the transaction amount, capped at $5.00 per transaction. So on a $50 product sale, you pay 25 cents. On a $2,000 annual membership, you pay $5.00.

    That fee is charged on top of Stripe’s standard payment processing fees (typically 2.9% + 30¢ for card transactions).

    If you opt into the registration and filing service, Stripe charges an additional monthly fee per jurisdiction where they file on your behalf. In the U.S., that’s $50 per state per month. For VAT in the EU, it’s typically bundled under a single OSS (One-Stop Shop) registration, which costs around $100–$200/month depending on your setup.

    For a solo operator selling a $29/month membership in five U.S. states, you’re looking at $250/month in filing fees alone—before accounting for the 0.5% per-transaction charge.

    When to turn it on

    Stripe Tax makes sense in three scenarios.

    First: You’ve crossed economic nexus thresholds in multiple jurisdictions and you’re already required to collect and remit tax. If you’re manually tracking rates and filing returns, the 0.5% fee is likely cheaper than paying an accountant to do it—especially if your transaction volume is high and your average order value is low.

    Second: You’re selling globally and dealing with VAT in the EU or UK. The rates vary by country, change frequently, and the compliance burden is real. Stripe Tax’s automatic rate updates and OSS filing support can save you hours every quarter.

    Third: You’re scaling fast and don’t want tax compliance to become a bottleneck. If you’re adding new products, entering new markets, or growing past $100K in annual revenue, turning on Stripe Tax early means one less thing to audit later.

    When to skip it (or wait)

    If you’re just starting out and your revenue is under $50K/year, you probably don’t need it yet. Most U.S. states have economic nexus thresholds around $100K in sales or 200 transactions per year. Until you hit those numbers, you’re not required to collect tax in those states.

    If you’re only selling in your home state or a single jurisdiction, the 0.5% fee is a convenience charge for something you could handle with a spreadsheet and a quarterly check to your state revenue department.

    And if your average transaction value is very high—say, $5,000+ for a consulting package or enterprise license—the capped $5 fee per transaction adds up quickly. You might be better off working with a tax professional who charges a flat monthly retainer.

    One non-obvious tip: test it in test mode first

    Stripe Tax has a full-featured test mode. Before you enable it in production, create a test checkout with your actual product prices and simulate transactions from different locations—California, Texas, Germany, Australia.

    Check the tax amounts Stripe calculates. Compare them against your state or country’s published rates. Make sure the line items on the receipt match what your customers will expect to see.

    This is especially important if you’re using Stripe Checkout or Payment Links, where the tax line appears automatically. If your pricing page says “$99” but checkout shows “$108.17,” and your customer wasn’t expecting that, you’ll lose the sale. Better to know now and adjust your messaging.

    If you’re running a content-driven business and want more deep dives like this—on tools, infrastructure, and the mechanics of online revenue—subscribe to One Two Three Send. Every week, you’ll get one operator-to-operator breakdown of something that actually moves the needle.

  • Monetising a product is easier than monetising attention

    Monetising a product is easier than monetising attention

    Most online operators start with the attention model: build an audience, then figure out how to extract money from their time. Newsletter sponsorships. Display ads. Affiliate links tucked into content. It feels like the natural path because it’s what you see working for others.

    But there’s a reason why operators who switch to product revenue—courses, memberships, software, templates, anything with a defined deliverable—rarely switch back. Product models scale differently, and for solo operators especially, they scale better.

    The attention tax compounds quietly

    When you monetise attention, every dollar requires continuous performance. A sponsorship pays once, then expires. Ad revenue tracks your traffic month to month. Affiliate income depends on someone else’s conversion funnel and commission structure.

    You’re not building equity. You’re renting out capacity.

    The math gets worse as you grow. To double sponsorship revenue, you need to double your audience or double your rate. Rates have ceilings—sponsors comparison-shop, and CPM benchmarks are public. So you chase growth, which means more content, more consistency pressure, more surface area to maintain.

    Then there’s the editorial drift. A reader-funded model points you toward what readers value. An attention model points you toward what scales: volume, virality, topics that pull search traffic even if they’re not what you’d choose to write about. Over time, the publication bends toward the model.

    Products let you decouple revenue from output

    Selling a product means you can earn the same amount while publishing less. A course that brings in $3,000 a month doesn’t care whether you published twice this week or not at all. A membership that delivers one deep tutorial every two weeks scales your income without scaling your content treadmill.

    This isn’t about working less—it’s about where you point your working hours. Instead of optimising for volume (another post, another sponsor, another traffic play), you optimise for conversion and retention. You spend time on the product, the onboarding flow, the member experience, the case studies that close sales.

    Products also let you serve smaller audiences profitably. A newsletter with 2,000 subscribers is almost impossible to monetise via sponsorships—your inventory is too small, your rates are too low, and sponsors want five-figure lists. But 2,000 subscribers with a $99 course and a 2% conversion rate is $4,000 in revenue from a single launch. Run that twice a year while growing the list, and you’ve got a real business.

    The chief objection: “I don’t have a product idea”

    This is almost never the real problem. If you’re writing regularly about a topic, you’re already teaching. The product is just the teaching formatted differently—less frequent, more structured, with a defined outcome.

    Start with what people already ask you to explain twice. That’s the course. Start with what you’d build for yourself if you had four hours. That’s the template or tool. Start with the workflow you’ve refined over two years that newcomers are still guessing at. That’s the membership.

    The other common block: “I don’t want to do a big launch.” Fine—don’t. Sell evergreen. Put a product page in your site footer. Mention it once per month in your newsletter. Let it convert passively while you write. You’ll be surprised how many people buy something useful without a countdown timer.

    Attention models aren’t wrong—they’re just expensive

    Sponsorships and ads work. They work especially well if you’re already at scale, if you have a team handling sales and production, or if your content velocity is naturally high and you’re not burning out.

    But for solo operators, the cost isn’t just time—it’s option value. Every hour spent chasing another sponsorship is an hour you didn’t spend building something that compounds. Every editorial decision bent toward traffic is a decision away from the tight, specific thing your best readers would pay for.

    If you’re still early, or if you’re hitting the ceiling on attention-based models and wondering what’s next, the move isn’t to optimize your sponsor deck. It’s to spend a month building the thing you’d sell if someone asked you to solve their problem directly.

    Then sell that.

    What’s one product you could ship in the next 30 days using what you already know? Reply and tell me—I read every response, and I’ll send you the follow-up guide on evergreen product funnels for solo operators.

  • Everything that breaks the first time you take a Stripe payment for your newsletter

    Everything that breaks the first time you take a Stripe payment for your newsletter

    Stripe is the default payment processor for most online newsletter and creator businesses, and it’s worth understanding because most operators end up using it whether they planned to or not. Substack is built on Stripe. Beehiiv is built on Stripe. Kit, ConvertKit, Memberful, Lemon Squeezy — all Stripe. If you’ve ever sold a paid subscription, you’ve already met it, even if you didn’t see the dashboard.

    This post is for operators thinking about going beyond the platform — running their own paid tier on WordPress, selling a one-off product, or running a small agency that needs to invoice cleanly. We’ll cover what Stripe actually is, what it costs at newsletter scale, the four concepts that trip up most operators on first contact, the real pitfalls (activation, tax, chargebacks), and when not to use it.

    What Stripe is, in one paragraph

    Stripe is a payment infrastructure company that handles the messy middle between your website and the card networks (Visa, Mastercard, Amex). When a subscriber clicks “Subscribe $10/month” on your newsletter, Stripe collects the card, runs it through fraud checks, charges it via the bank, deals with international currency conversion, retries failed cards on a schedule, sends the customer a receipt, and shows up in your bank account a few business days later as a deposit. You never touch the card data. You never run a banking integration. You pay them roughly 2.9% + 30¢ per transaction and they handle the rest.

    What makes Stripe different from PayPal or Square is that it’s developer-first. The API is excellent, the dashboard is good (not great, but good), and it’s the one platform where every newsletter tool, course platform, and SaaS app can integrate easily. That ecosystem effect is the moat.

    What it actually costs at newsletter scale

    Stripe’s standard rate is 2.9% + 30¢ for US cards and 3.4% + 30¢ for international cards. Real averages for US-based newsletter operators end up around 2.9–3.4% all-in.

    Annual revenueStripe fees (approx)What that buys
    $10,000$300~440 charges processed, customer portal, dunning, receipts
    $50,000$1,500Same plus fraud detection on autopilot
    $250,000$7,500Volume discount eligibility (negotiable above $1M)

    For comparison, building anything close to this from scratch — fraud detection, retry logic, customer-facing portal, tax handling — costs more than the fees. The Stripe rate is the cheapest part of the whole stack. Operators who agonise over the 2.9% are usually missing what they’d spend rebuilding it.

    The four use cases for a newsletter operator

    1. Paid newsletter subscriptions

    The big one. Monthly and annual recurring subscriptions, typically $5–15/month or $50–150/year. Three patterns work for newsletters:

    • Monthly + annual + founding member. Standard Substack split. Annual gets a 17% discount. Founding member is 10x the annual price for readers who want to support the publication beyond the standard tier — surprisingly common at the right audience size.
    • Annual only. Eliminates the worst-converting tier (monthly), reduces churn, simplifies cashflow forecasting. Used by operators who want a smaller list of higher-LTV readers.
    • Pay what you want above a floor. Stripe supports this via Custom Pricing on Checkout. $5/month minimum, customer enters whatever they want above. Niche but works for community-driven newsletters.

    2. One-off products

    Ebooks, course access, sponsored slots, archive bundles. One-off charges with optional digital delivery via Stripe’s Payment Links (zero coding, drag-and-drop). For a newsletter operator selling a $29 ebook, Payment Links is the fastest route — generate a link, paste in your newsletter, done.

    3. Tipping / donations

    Some readers want to support a free newsletter without subscribing. Set up a Stripe-hosted Payment Link with custom amount enabled. One-line install in your footer: “Tip the writer →”. Closer to a Patreon model but without the platform tax.

    4. Agency / consulting invoices

    If you run an agency alongside the newsletter, Stripe Invoices replaces every invoicing tool you’ve used. Send a hosted invoice link. Client clicks, pays, you get notified, accounting reconciles via the Stripe export. Free if the invoice gets paid by card (you pay the standard processing fee), free if paid by ACH.

    The four concepts that trip up newsletter operators

    These are the four things that, in our experience, every operator runs into in their first month and doesn’t fully understand until month three.

    Checkout vs Payment Links vs Pricing Tables

    Three Stripe products that look similar but solve different problems:

    • Checkout — a Stripe-hosted page you redirect to. Best for paid subscriptions and most one-off products. Two lines of code.
    • Payment Links — a single static URL Stripe generates from the dashboard. No code at all. Best for tipping, ebooks, anything where you don’t need a custom checkout flow.
    • Pricing Table — an embedded HTML block (a couple of lines of code) that shows multiple tiers side by side. Best for subscription-with-tier-comparison pages.

    Most operators pick the wrong one because the docs make Checkout sound default. For a single product or single tier, use a Payment Link. For “monthly vs annual vs founding member” comparison, use a Pricing Table. Use Checkout when you actually need fields the others don’t support (custom metadata, B2B tax IDs, complex flows).

    Webhooks

    Webhooks are HTTP callbacks Stripe fires when something happens in your account (payment succeeded, subscription cancelled, card failed). Without webhooks, your site doesn’t know when someone pays or unsubscribes — you have to poll the Stripe API or check the dashboard manually.

    The mistake operators make: skipping webhooks because the platform “seems to work without them.” Then a subscriber cancels, Stripe stops billing, but your site keeps showing them as a paid subscriber for weeks. Or a card fails, Stripe stops collection, but your welcome email keeps going to a churned customer. Set up webhooks on day one. The single endpoint your platform exposes (e.g. /wp-json/otts-pro/v1/stripe/webhook) is the difference between a working paid-newsletter system and a broken one.

    Customer Portal

    The Customer Portal is a Stripe-hosted page where your subscribers can manage their own subscription — change card, switch from monthly to annual, cancel, view invoices. It’s free, takes about an hour to enable, and prevents 100% of “how do I cancel” support emails.

    If you don’t enable it, every cancellation request becomes a manual ticket where you log into the Stripe dashboard, find the customer, click Cancel, and email them confirmation. At 100 paid subscribers this happens once a week. At 1,000 it happens daily. Enable the Customer Portal on day one and link to it from your welcome email.

    Smart Retries / dunning

    Stripe’s “Smart Retries” feature retries failed card charges on a schedule (3 days later, 5 days later, 7 days later). Stripe also handles the customer-facing “your card failed, please update it” emails. This is dunning, and it recovers something like 30–40% of payments that would otherwise be lost.

    It’s not on by default for every account. Go to the Billing settings → Subscription and emails → enable both Smart Retries and the failed-payment emails. Most operators discover this exists after watching their MRR drop unexpectedly because expired cards weren’t being recovered.

    Setup, in the order to actually do it

    1. Create a Stripe account at dashboard.stripe.com/register. The signup is fast. Use your business email, not personal.
    2. Activate the account. Stripe asks for business details — legal name, registered address, tax ID, bank account, ID document for the responsible person. Most US accounts activate within an hour; business-entity verification can take 1–2 business days. Do this before you launch your paid tier; activation delays after you’ve taken pre-orders are stressful.
    3. Set up the bank account for payouts. Daily payouts are the default. If your bank charges per deposit, switch to weekly.
    4. Enable the Customer Portal in Settings → Billing → Customer Portal. Configure what subscribers can change themselves (recommended: cancel, update card, change plan, download invoices).
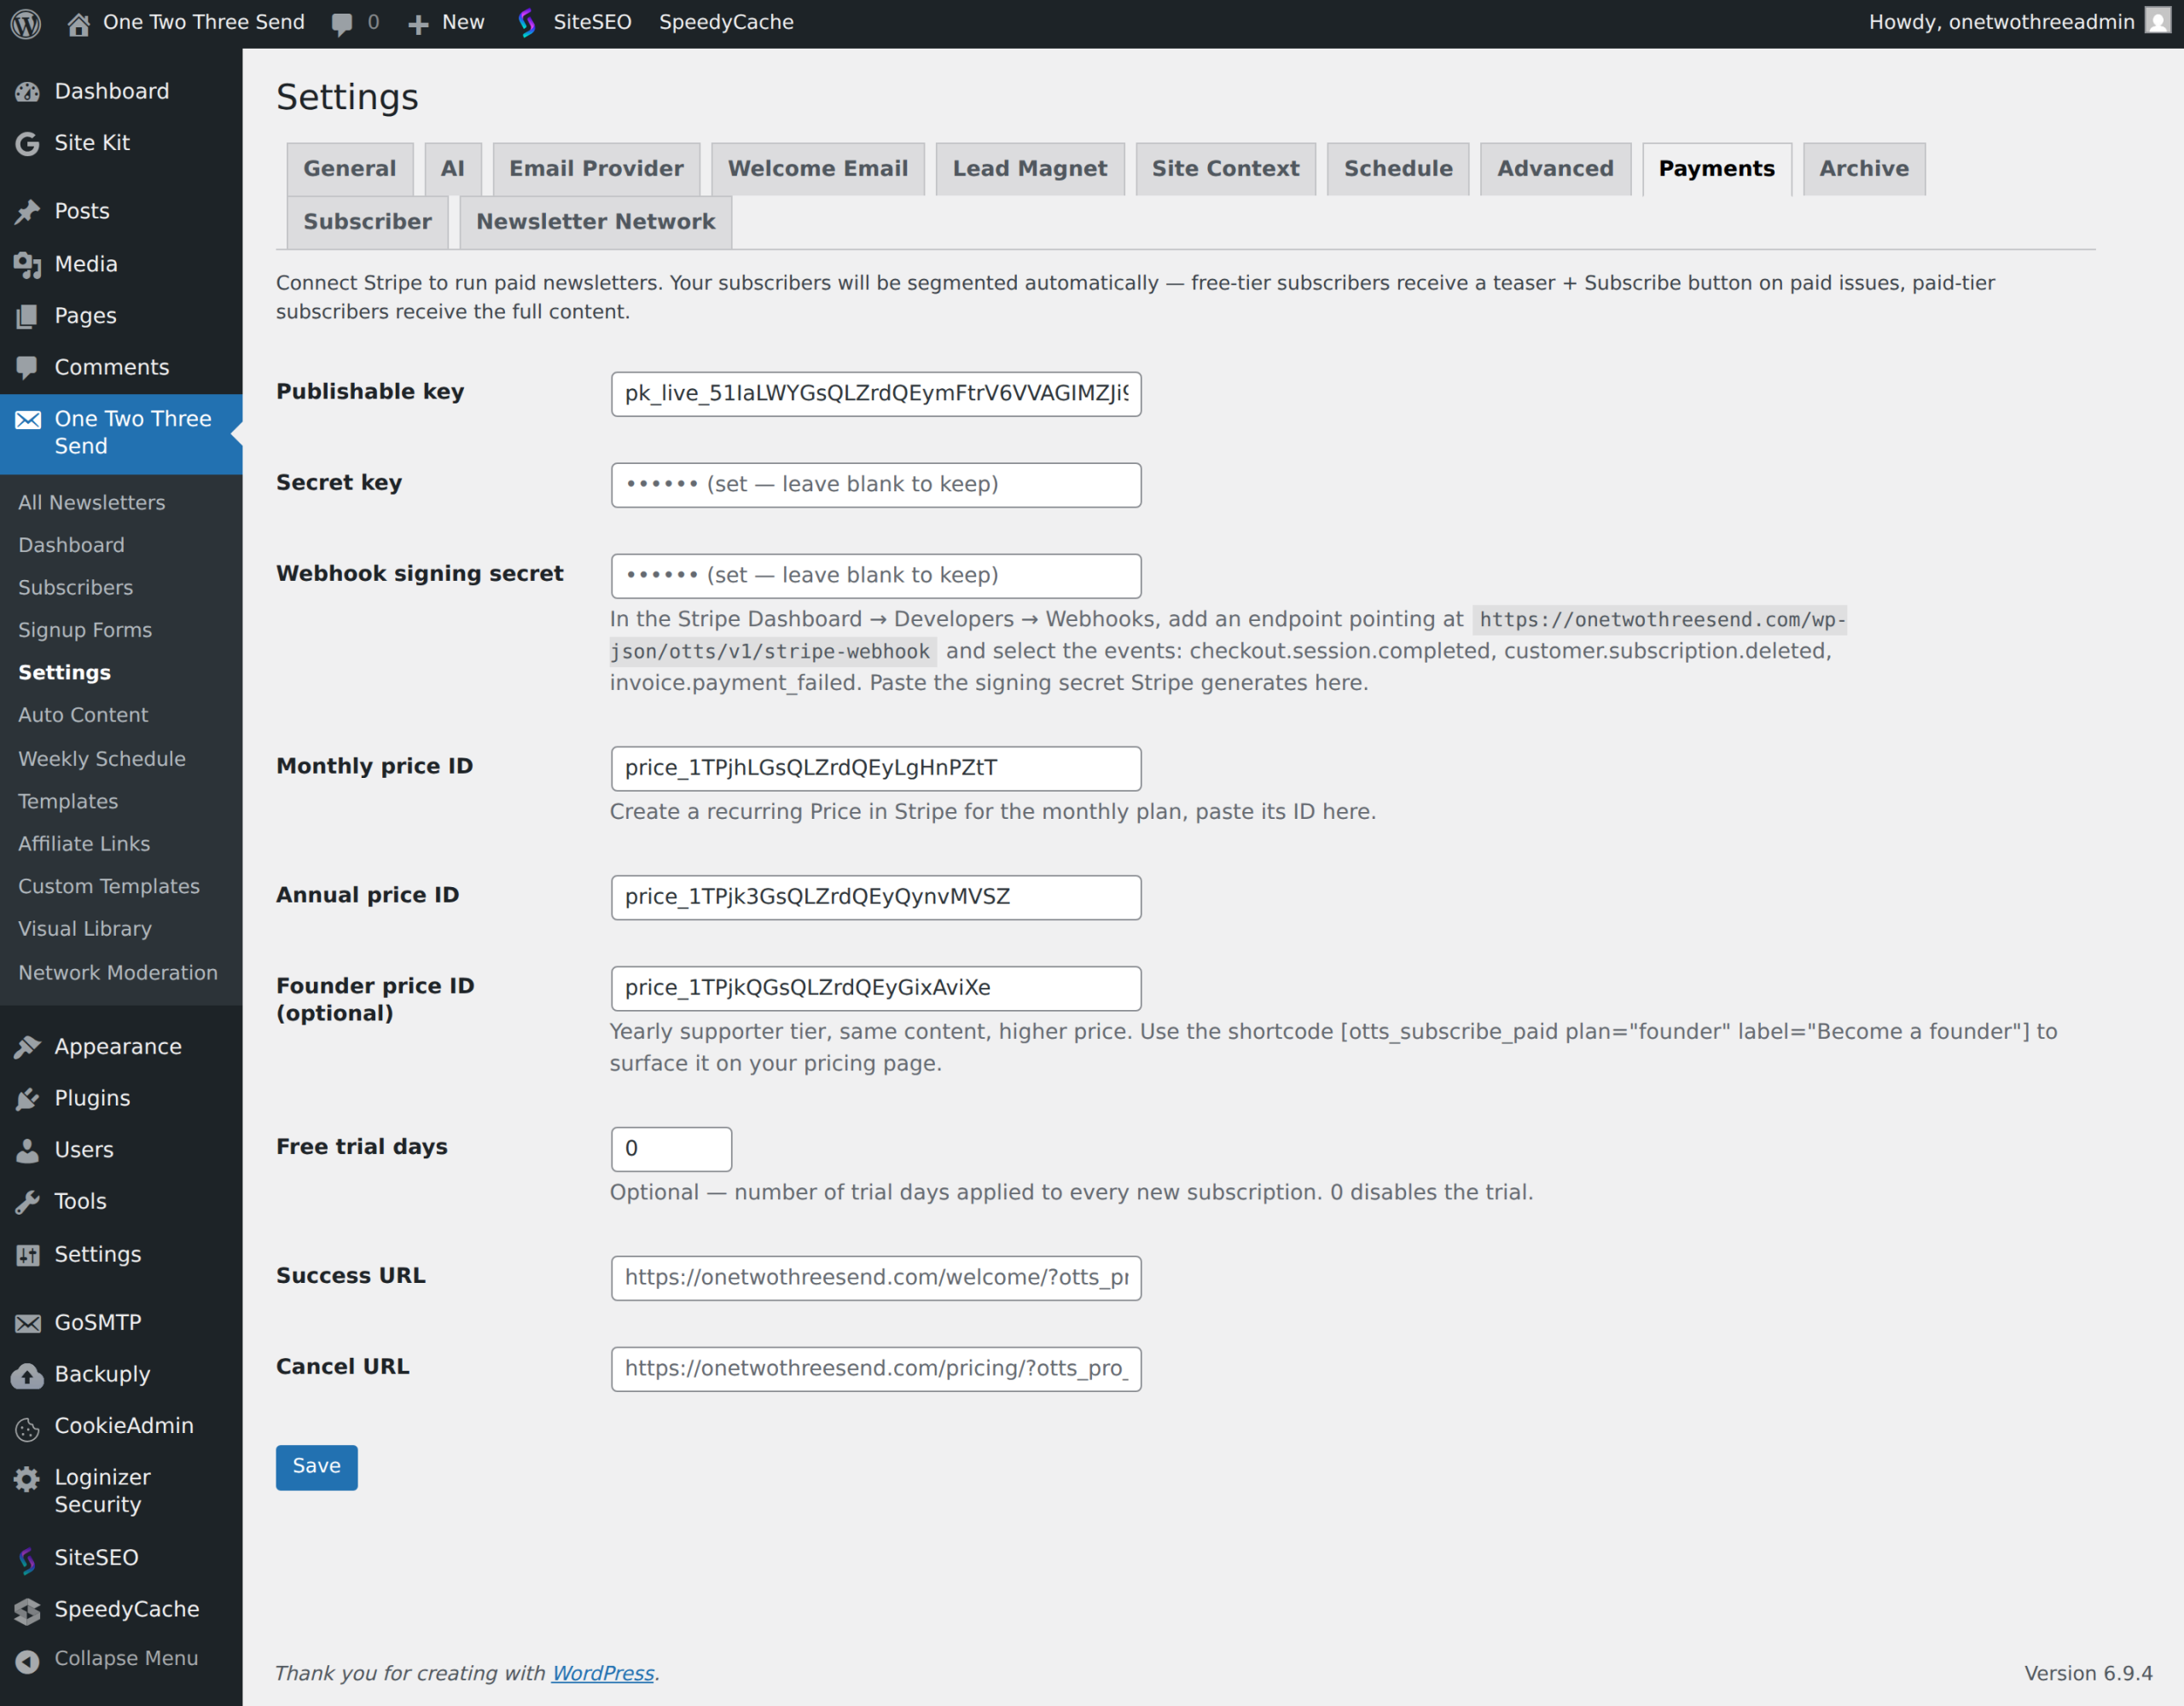
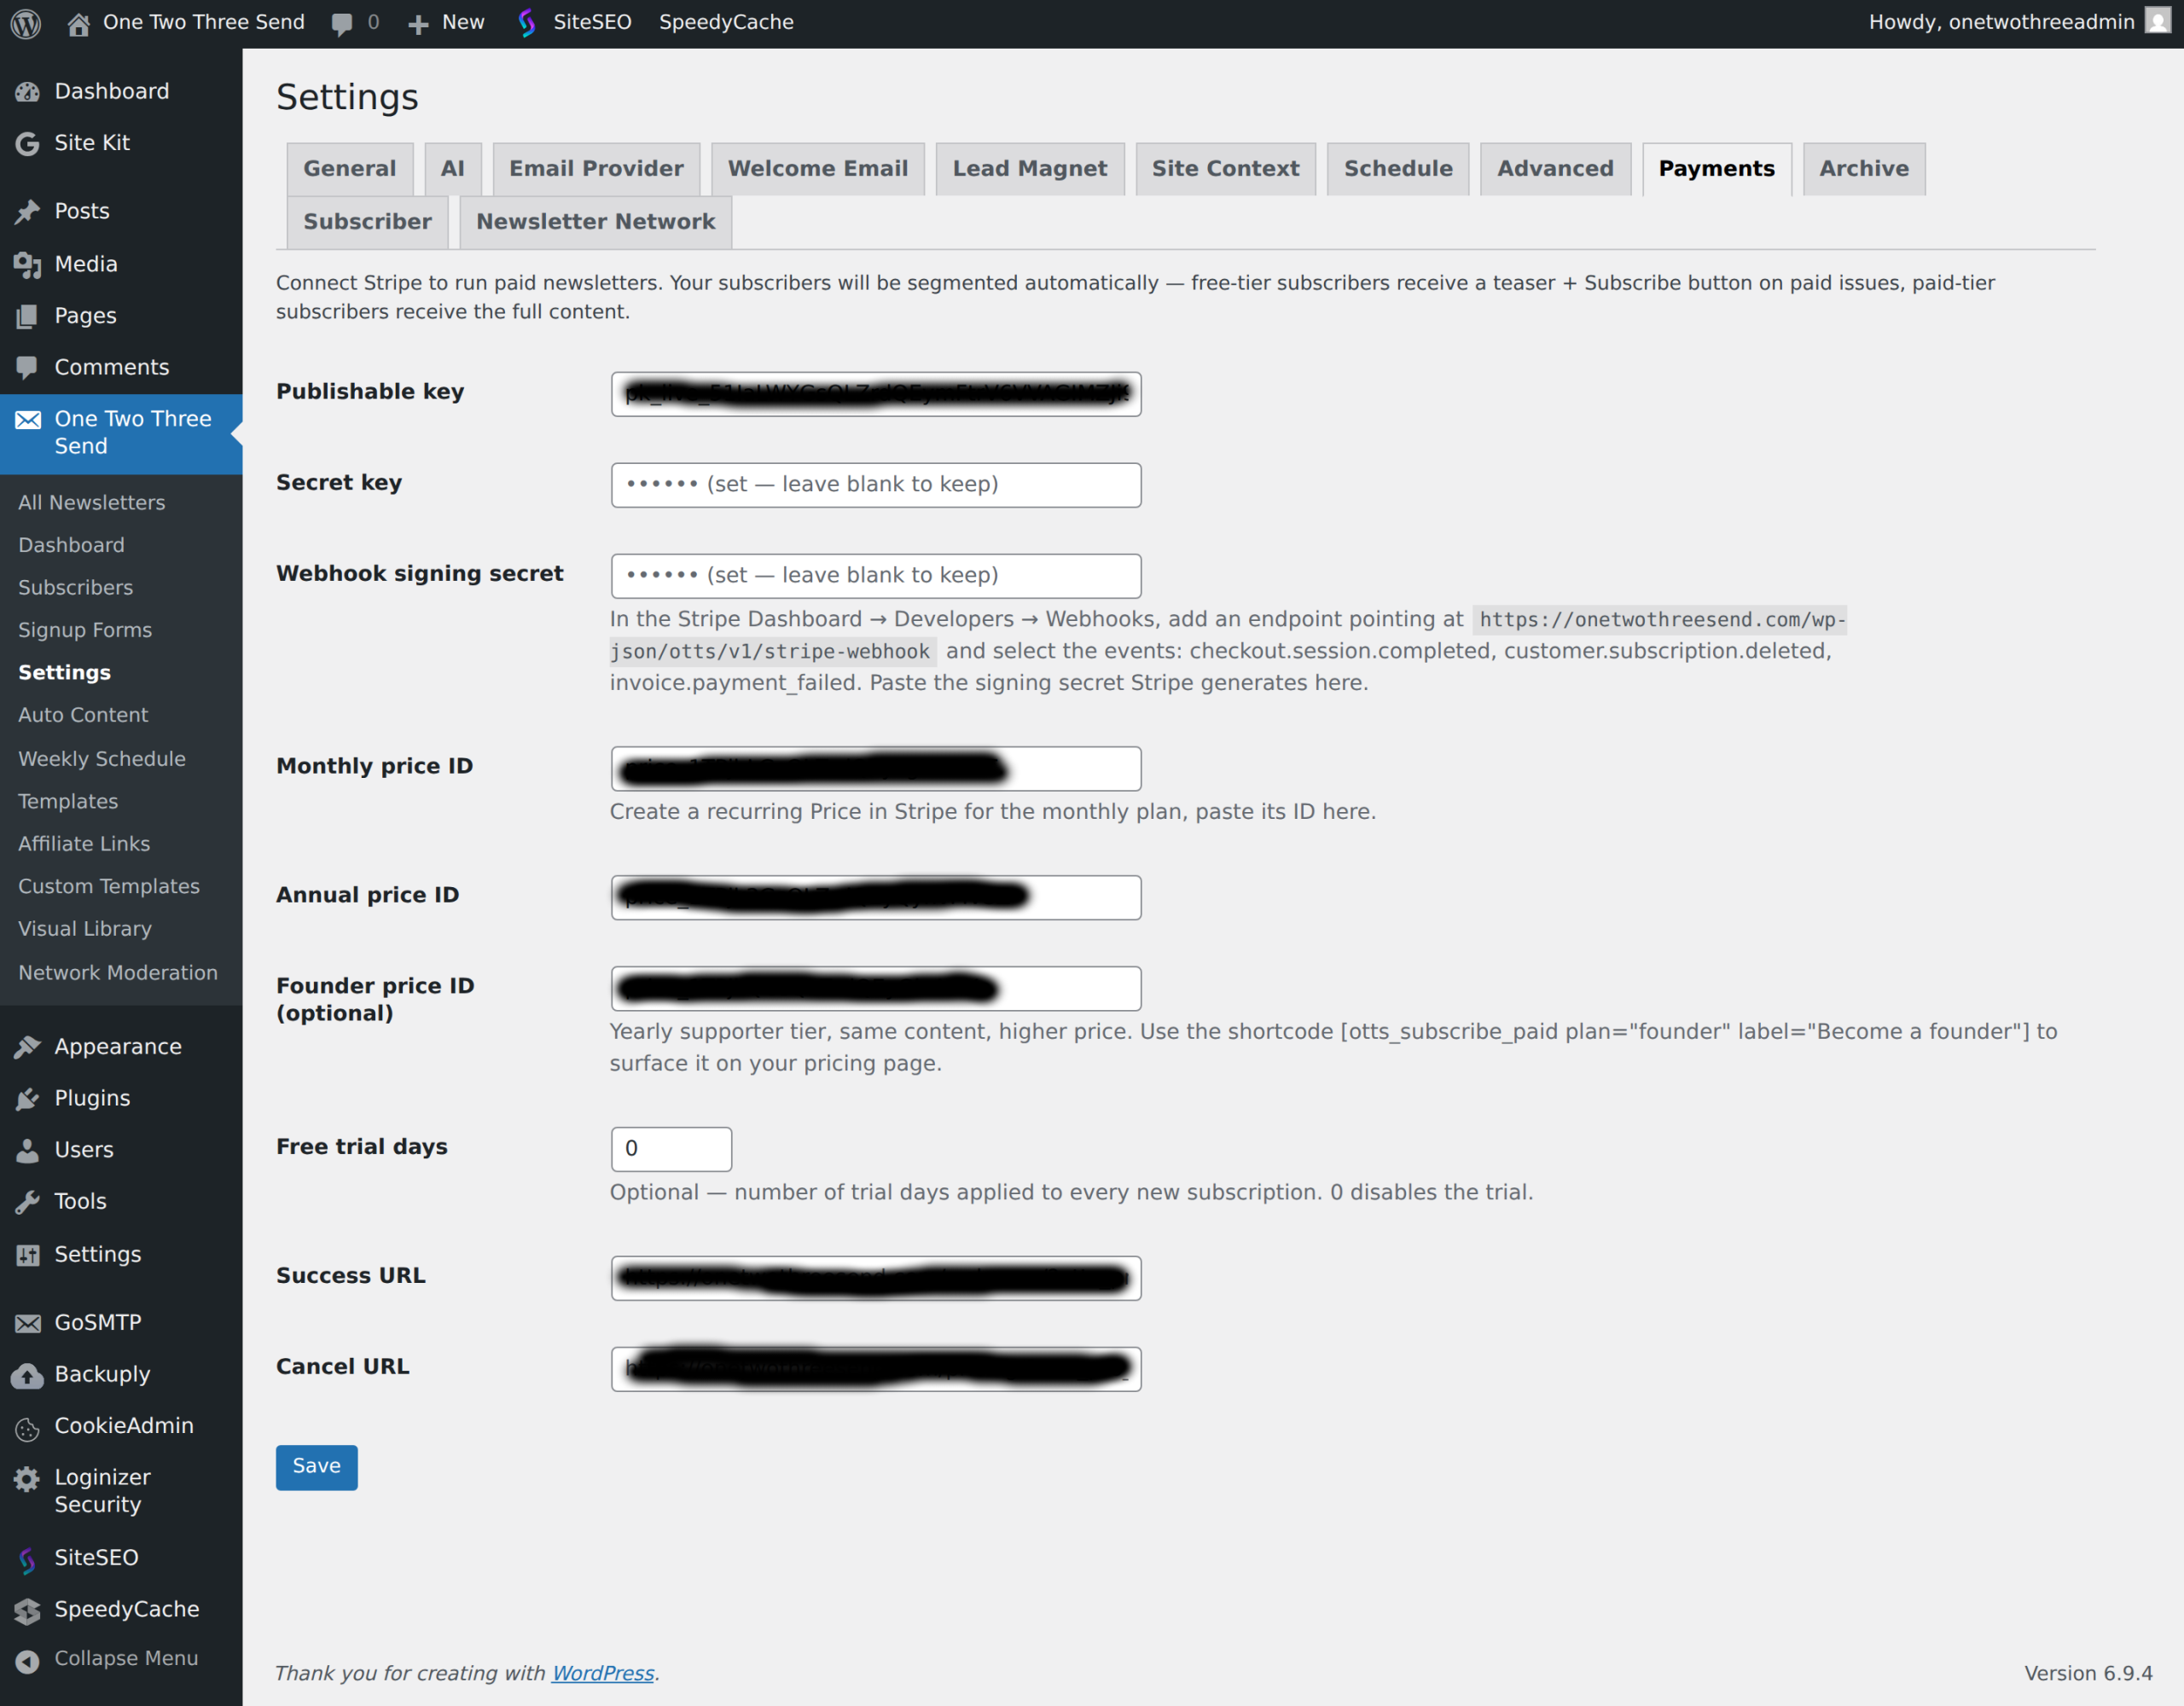
    5. Set up products + prices in the Stripe dashboard, not in code. Define a “Newsletter Subscription” product with monthly and annual prices. Price IDs (price_xxx) are what your platform references.
    6. Set up webhooks pointing at your platform’s webhook endpoint. Subscribe to at minimum: checkout.session.completed, customer.subscription.updated, customer.subscription.deleted, invoice.payment_failed.
    7. Configure tax handling via Stripe Tax. Turn it on the moment you sell internationally; for US-only sellers you can defer until you cross state-level economic nexus (commonly $100k in revenue or 200 transactions in a single state).
    8. Test in test mode before going live. Stripe provides test card numbers (4242 4242 4242 4242 always succeeds, 4000 0000 0000 0002 always declines). Run your full subscribe → cancel → resubscribe flow before flipping the switch.

    Pitfalls, in the order operators usually hit them

    1. The activation delay catches people before launch. You announce the paid tier on Twitter, send your announcement newsletter, and discover the Stripe account isn’t activated yet. New subscribers see “Payments are temporarily unavailable.” Activate the account a week before you intend to take payments.

    2. Tax registration for international and out-of-state sales. The day you take a payment from an EU resident, you’ve technically created a VAT obligation in their country once you cross the threshold. Domestically, US sellers cross state-level sales-tax obligations as soon as you trigger economic nexus (commonly $100k in revenue or 200 transactions per state). Stripe Tax handles the calculation and remittance for both — turn it on. Don’t try to handle this manually.

    3. Currency conversion losses. If your prices are in $ but a UK or EU customer pays in £ or €, Stripe converts at a slightly worse rate than wholesale. Over a year of $10k in international payments, this is roughly $250 in extra fees. For most operators it’s negligible. For high-volume operators with a heavily international audience, multi-currency pricing (separate $, £, € prices for the same tier) is worth the setup time.

    4. Chargebacks. A subscriber forgets they signed up, sees a charge on their statement, calls their bank, and disputes it. Stripe charges $15 per dispute regardless of outcome, plus the original charge gets reversed. The fix: clear billing descriptors (your statement descriptor should be your newsletter name, not “STRIPE PAYMENT”), explicit confirmation emails on first charge, and a visible Customer Portal so cancellations don’t become disputes.

    5. The “trial that never converts.” If you offer a 14-day free trial, plan for 30–50% of trials to never enter a card. Stripe’s Trial requires a card upfront by default; consider whether your business model can handle the conversion drop from card-required vs the support overhead of cardless trials.

    6. Refund policy ambiguity. Newsletter operators often forget they need a refund policy. Stripe’s terms require it. Most newsletters use “no refunds, cancel anytime to stop future charges” — fine, just put it on the pricing page.

    Long-term maintenance

    Monthly: review the Stripe dashboard’s reporting — MRR, churn, failed payments, top products. Stripe’s built-in reporting is enough for most operators; only graduate to ChartMogul or similar if you’re managing multiple products with complex cohort analysis.

    Quarterly: reconcile Stripe payouts with your accounting software. Most accounting tools (QuickBooks, Xero, Wave, FreshBooks) have direct Stripe integrations. Check that fees are categorised correctly and that you’re capturing the right amount as taxable income (revenue, not net of fees).

    Annually: review your dunning configuration. The default Stripe retry schedule is good but not optimal — if your average customer’s card expires every 36 months and you’re seeing more declines than expected, lengthen the retry window. Also review tax thresholds — if you’ve crossed a new sales-tax or VAT registration threshold, Stripe Tax will surface this but you need to act.

    When something breaks: Stripe’s status page (status.stripe.com) is reliable. If checkout’s down, check there before debugging your own code. Outages are rare but they happen.

    When Stripe is the wrong choice

    If you publish entirely on Substack or Beehiiv, you’re already on Stripe — the platform handles the integration and you don’t need to manage it directly. The platform takes 10% of your revenue for that convenience. That’s a fair trade until you outgrow the platform’s limitations.

    If your audience is heavily in countries where Stripe lacks strong local payment methods (most of South America, parts of Africa, India to a lesser extent), look at regional alternatives — Razorpay in India, Mercado Pago in Latin America. Or use Stripe with regional payment-method enabled (iDEAL, Bancontact, etc.) and accept that some markets will be harder to convert.

    If you’re selling primarily B2B with complex invoicing requirements (purchase orders, net-60 terms, custom contracts), Stripe Invoices is fine but accounting-software-native invoicing (QuickBooks, Xero) often integrates better with the rest of the B2B workflow.

    For everyone else, Stripe is the default — and like the other infrastructure decisions in this stack, that’s the highest compliment infrastructure can earn.

    Some links in this post are affiliate links — we earn a small commission if you sign up through them, at no cost to you. We only recommend tools we actually use.

  • Stripe’s payment links vs. checkout sessions: which one to use

    Stripe’s payment links vs. checkout sessions: which one to use

    Stripe offers two ways to collect payment without building a full checkout flow: payment links and checkout sessions. They look similar on the surface—both generate a Stripe-hosted page where customers enter their card details—but they solve different problems and scale differently.

    If you’re selling a course, accepting sponsorships, or launching a paid tier, knowing which tool to reach for saves you from either over-engineering or outgrowing your setup in three months.

    What payment links do well

    Payment links are static URLs you generate once in the Stripe dashboard. You pick a product, set a price, click “Create link,” and get a URL like buy.stripe.com/abc123. You paste that into an email, a Notion page, a Linktree, or anywhere else.

    They’re dead simple. No code. No integration. You can create one in under 60 seconds.

    They work best when:

    • You’re selling one or two products with fixed pricing
    • You want to test demand before building infrastructure
    • You need to send a payment request to a specific person (e.g., a sponsor invoice)
    • You’re embedding buy buttons in no-code tools like Carrd or Notion

    The trade-off: payment links are not dynamic. You can’t pass custom data, adjust pricing per customer, or trigger complex logic after payment. Every link points to the same product at the same price. If you want to sell three tiers, you need three separate links.

    When checkout sessions make more sense

    Checkout sessions are generated programmatically via Stripe’s API. Instead of a static URL, your server (or a tool like Zapier, Make, or a membership plugin) creates a unique session each time someone clicks “Buy.” That session can include custom line items, coupon codes, customer metadata, or pre-filled email addresses.

    You need a bit of code—or a tool that wraps the API—but you get control in return.

    Checkout sessions shine when:

    • You’re selling multiple SKUs or pricing tiers from one page
    • You want to pass user data (email, name, UTM params) into Stripe’s metadata
    • You need to apply dynamic discounts or generate invoices on the fly
    • You’re integrating with a CRM, membership site, or email platform that reacts to purchase events

    For example: if you run a course platform and want to tag buyers in ConvertKit the moment they pay, a checkout session can include the buyer’s email and course ID in metadata. A webhook listens for checkout.session.completed, pulls that metadata, and fires the tag. Payment links can’t do that.

    Pricing and limits

    Both options use the same Stripe transaction fees: 2.9% + 30¢ for cards in the U.S. There’s no additional cost for using payment links vs. sessions.

    Payment links support subscriptions, one-time payments, and even “customer chooses price” donation-style flows. Checkout sessions support the same, plus more flexibility around tax collection (Stripe Tax), installment plans, and multi-currency pricing.

    One gotcha: payment links expire after 90 days of inactivity if you’re on a free Stripe account and haven’t processed volume recently. Checkout sessions expire after 24 hours by default (you can extend this to 30 days), but they’re generated fresh each time, so expiration is rarely an issue in practice.

    Which one to pick

    Start with a payment link if you’re testing, selling one thing, or need something live in the next five minutes. It’s faster than building anything, and you can always upgrade later.

    Move to checkout sessions when you need:

    • Dynamic pricing or product selection
    • Integration with your CRM, ESP, or membership tool
    • Custom metadata or post-purchase automation
    • A branded checkout domain (Stripe lets you use checkout.yourdomain.com with sessions, not links)

    Most solo operators start with payment links for their first product, then switch to sessions once they’re running webinars, cohort courses, or tiered sponsorships. The migration is straightforward—your Stripe account, customer data, and reporting stay the same. You’re just changing how the checkout URL gets generated.

    If you’re already using WordPress and want a middle ground, plugins like WP Simple Pay generate checkout sessions without writing code. You build a shortcode-based button, and the plugin handles the API call behind the scenes.

    One more thing: whichever option you pick, turn on Stripe’s email receipts in your dashboard settings. A shocking number of operators forget this, and customers assume the payment didn’t go through when they don’t get confirmation. That’s a support ticket you don’t need.

    Want more breakdowns like this? Reply and tell us which tool or feature you’re trying to figure out—we’ll cover it in a future issue.