
Author: onetwothreeadmin

  • Subscription bombing: why bots sign up to your newsletter (and how to block them)

    Subscription bombing: why bots sign up to your newsletter (and how to block them)

    If you run a newsletter, you’ve probably noticed signups appearing in your subscriber list with email addresses that look subtly wrong. Names you don’t recognise. Local-parts with strange dot patterns like [email protected]. All marked as “direct” with no referer, no UTM, no obvious traffic source.

    These aren’t your audience. Your site is being used as a relay in an attack on someone else’s inbox. The technical name is subscription bombing (also called list bombing or mail bombing), and once you know what to look for, you’ll see it on almost every newsletter signup form on the open web.

    What subscription bombing actually is

    An attacker picks a victim — usually one specific email address. They run a bot that visits thousands of unrelated websites that accept newsletter signups and submits the victim’s email to every one of them.

    Within ten minutes, the victim’s inbox fills with two hundred legitimate-looking welcome emails from newsletters they never signed up for. Travel sites, ecommerce stores, hobby blogs, university mailing lists, charity newsletters. Each individual email is innocuous. The pile is the point.

    Your site isn’t being attacked. Your site is being used as a small, expendable cog in an attack on someone you’ve never met.

    Why attackers do this

    The motive is almost always to hide a single critical email from the victim:

    • Credit card fraud cover. The attacker just made a $2,000 purchase on the victim’s stolen card. The bank will send a fraud-alert email within minutes. If that alert is buried under 300 newsletter confirmations, the victim might not see it until after the cancellation window closes.
    • Account recovery. The attacker is trying to take over the victim’s email or banking account. Password-reset confirmations and 2FA codes get buried in the same way.
    • Harassment. Less common, but bombings are sometimes used to make a target’s inbox unusable for days.

    There are services that openly sell this. “1,000-site mail bomb, $30.” They use rented botnets so the requests come from thousands of residential IPs — no single source to block.

    How to spot it on your own list

    Two patterns are diagnostic:

    The dotted-Gmail trick

    Gmail ignores dots in the local-part of an address. [email protected], [email protected], and [email protected] all deliver to the same inbox. Each site’s database stores them as distinct addresses (so per-site dedup doesn’t catch the second signup), but the victim receives every email.

    If you see several Gmail signups in the same short window with unusual dot patterns, those are almost certainly bot signups. Real humans don’t sprinkle random dots through their own email when filling out a form.

    Missing referer, missing UTM, sub-minute conversion

    Bots that target your endpoint directly never load the form page first. They POST straight to the subscribe endpoint with just {email}. As a result:

    • No Referer header.
    • No utm_source on the landing URL.
    • No first-touch attribution cookie.
    • “First seen” and “subscribed” timestamps within seconds of each other.

    A real visitor might land via Facebook, browse for a few minutes, then sign up. Their attribution captures something. Bots leave nothing.

    Layered defences that actually work

    No single check stops subscription bombing. The pattern is layered defences, each catching a slightly different bot class:

    1. Honeypot field. A hidden input field that real humans never see. Bots that scrape the form HTML and fill every input get caught. Cheap, transparent, zero UX impact. Useless against bots that POST straight to the endpoint without loading the form.
    2. Per-IP rate limit. N submissions per IP per hour. Catches bursty single-IP attacks. Useless against distributed botnets across thousands of residential IPs.
    3. MX-record check. Reject signups whose email domain has no MX (mail exchanger) record. Catches typos and made-up domains. Cheap — one DNS lookup. Useless against Gmail-based attacks.
    4. Disposable-domain blocklist. Reject signups from known throwaway services (mailinator, guerrillamail, yopmail, etc.). Useless against real-domain attacks but kills another bot class.
    5. Gmail dot-normalization. Strip dots from the local-part of Gmail addresses before storing. If [email protected] already exists, the second variant gets rejected as a duplicate. Catches dot-trick attacks on a single site (though not across multiple sites).
    6. Cloudflare Turnstile. Invisible CAPTCHA. By far the most effective single layer — it makes bot signups dramatically more expensive to attempt. Some UX cost: real users with strict privacy extensions occasionally fail it.
    7. Double opt-in. Send a confirmation email; only add the subscriber once they click. The standard ESP defence. It doesn’t prevent the bomb (you still send one email) but it stops the victim from being added to your ongoing list, which protects your sender reputation downstream.

    Each layer should silently accept-and-drop suspicious signups — return HTTP 200, never reveal which check tripped. If your endpoint says “rate limited” or “honeypot detected,” attackers immediately adapt.

    What One Two Three Send does out of the box

    As of version 2.0.20, the free plugin’s /wp-json/otts/v1/subscribe endpoint runs four layers automatically:

    • Honeypot on the form (hidden website input — already in earlier versions).
    • Per-IP rate limit — 10 submissions per IP per hour by default, filterable via otts_subscribe_rate_limit_per_hour.
    • MX-record validation on the email domain.
    • Disposable-domain blocklist of ~30 common throwaway services, filterable via otts_subscribe_disposable_domains.

    All four layers silently accept-and-drop — bots can’t fingerprint which check rejected them.

    The Subscribers admin page now has a Delete button on every row for cleaning up signups that slip through. Two new admin-only REST endpoints (DELETE /wp-json/otts/v1/subscriber/{id} and POST /wp-json/otts/v1/subscriber/delete-by-email) let you script bulk cleanups if you need to delete dozens of bot signups at once.

    If your site is being bombed heavily, Cloudflare Turnstile in front of your signup form is the next step. It’s free, integrates in a few lines of JS, and stops the overwhelming majority of attacks that get past the layers above. Double opt-in is the layer after that.

    One thing worth keeping in mind

    If you see fifty bot signups appear in your list, your first reaction will probably be annoyance about list-hygiene. The bigger picture is that fifty real people — strangers, somewhere — just had their inboxes flooded as cover for a fraud or account-recovery attack. Tightening up your form isn’t just protecting your sender reputation. It’s removing one of the small relays that subscription-bombing services rent out by the thousand.

    Every site that adds a honeypot, a rate limit, or a Turnstile widget makes that business model a little less profitable. That’s worth doing.

  • Paid search vs. organic content: which builds revenue faster?

    Paid search vs. organic content: which builds revenue faster?

    Every solo operator hits the same fork in the road: spend money on Google Ads to get traffic today, or invest time in SEO to earn it for free six months from now.

    The conventional advice—”do both”—ignores the reality of limited budgets and single-person operations. You need to pick one, at least to start. Here’s how to make that call based on your business model, your offer, and your tolerance for waiting.

    When paid search wins

    Google Ads gets you in front of buyers the day you launch a campaign. If you’re selling a productised service, a course, or a SaaS tool with a proven conversion rate, paid search lets you test messaging, validate demand, and generate revenue while your content strategy is still a Notion doc.

    The break-even math is simple: if your customer lifetime value is $500 and you can acquire a customer for $150 via Google Ads, you’re profitable from day one. That margin funds more ads, more tests, and eventually the content team you wish you had time to build.

    Paid search also works when your market is narrow and your keywords are cheap. A consultant selling fractional CFO services to SaaS founders can buy “fractional CFO for SaaS” at $8 per click and convert at 5%. That’s $160 per customer—sustainable if the contract is worth $3,000.

    But paid search stops the moment you stop paying. Your cost per acquisition never improves structurally; you’re renting attention, not owning it. And if your offer doesn’t convert above 2%, or your LTV is under $200, the unit economics collapse fast.

    When organic content wins

    SEO is a compounding asset. Publish 50 articles that rank, and they generate traffic—and revenue—for years without additional spend. A tutorial on “how to migrate from Mailchimp to ConvertKit” can drive 400 visits a month for three years, converting 2% of readers into affiliate commissions or newsletter subscribers.

    Organic content works best when you’re building an audience business—newsletters, memberships, affiliate income—or when your product has a long sales cycle. If buyers need to read six articles before they trust you enough to book a call, SEO is feeding that funnel for free while paid ads burn budget on cold traffic.

    The trade-off is time. Expect six months before you see meaningful traffic, and twelve before it becomes a dependable revenue channel. You’re also competing with sites that have been publishing for a decade. Ranking for “email marketing tips” is nearly impossible; ranking for “Beehiiv vs. ConvertKit for paid newsletters” is achievable in 90 days.

    SEO also favours operators who can write. If you’re paying $300 per article to a freelancer, your payback period stretches to 18 months. If you’re writing yourself at 1,000 words per hour, the math tilts in your favour.

    The hybrid play most operators miss

    Here’s the move that works if you have $500/month to spend: run Google Ads on your three highest-intent keywords while you build out the content that will eventually rank for them organically.

    The paid campaign generates revenue and validates which keywords actually convert. The organic content builds slowly in the background. After six months, your articles start ranking, your cost per click drops as organic traffic offsets paid volume, and you can reallocate ad spend to new keywords or turn it off entirely.

    This only works if your paid campaigns are profitable from week one. If you’re losing money on ads while waiting for SEO to kick in, you’re just burning capital in two directions.

    How to choose right now

    If your offer converts above 3%, your LTV exceeds $300, and you need revenue this quarter, start with paid search. Build a single campaign around five keywords, set a $20/day budget, and measure cost per acquisition weekly.

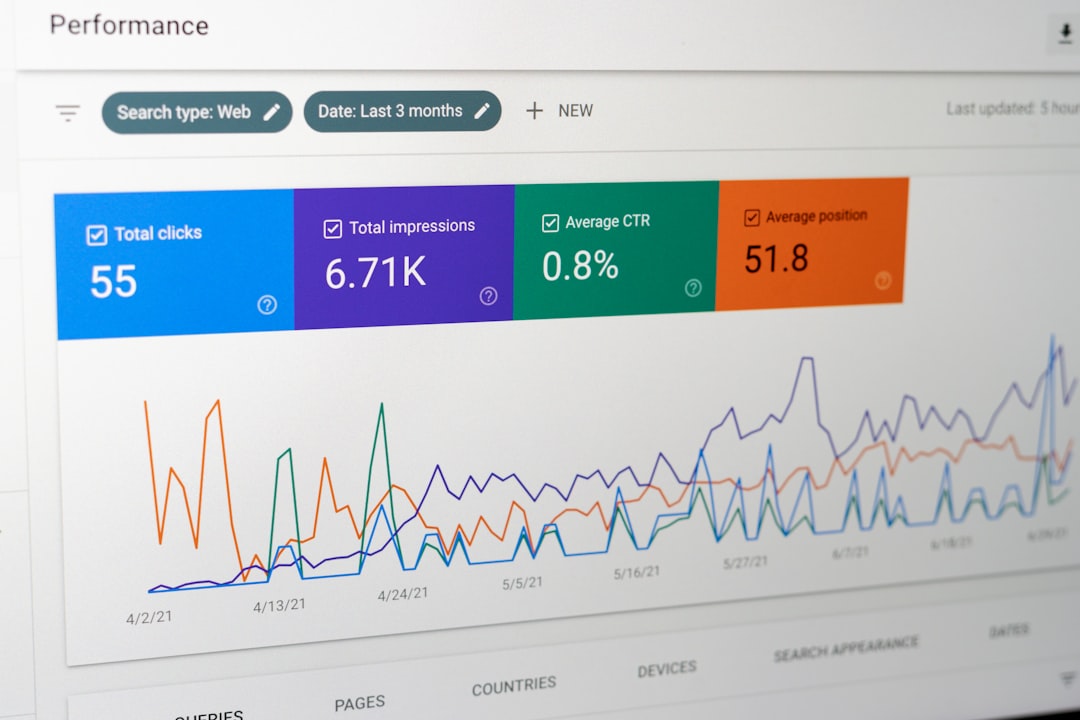
    If you’re pre-revenue, building an audience, or selling something with a six-month consideration cycle, start with organic content. Publish two articles per week for 90 days, target long-tail keywords with under 500 monthly searches, and track rankings in Google Search Console.

    If you’re somewhere in between, run a one-month paid test with a $300 budget. If your CPA is under half your LTV, keep running ads and layer in content. If it’s not, kill the campaign and go all-in on SEO.

    Want more breakdowns like this? Subscribe to One Two Three Send for weekly tactics on traffic, tools, and revenue—written for operators who don’t have a marketing team.

    Heads up — some links in this article are affiliate links. If you sign up through them, we may earn a small commission at no extra cost to you. We only recommend tools we use ourselves.
  • WordPress cron jobs: what runs when and how to fix the slowdowns

    WordPress cron jobs: what runs when and how to fix the slowdowns

    WordPress cron is a lie. It’s not a scheduled task runner—it’s a script that fires when someone visits your site. If nobody visits for an hour, nothing runs for an hour. If fifty people hit your homepage at once, that script might try to run fifty times simultaneously.

    That’s why your admin dashboard sometimes loads slowly, or why your scheduled posts don’t publish at the exact minute you set. Understanding what WordPress cron actually does—and when to replace it—matters once you’re running a content operation that depends on predictable publishing and performance.

    What WordPress cron actually runs

    Every WordPress install has a default set of cron jobs baked in. These include:

    • Checking for plugin and theme updates
    • Publishing scheduled posts
    • Clearing expired transients (temporary data stored in your database)
    • Sending pingbacks and trackbacks
    • Running database cleanup tasks

    Plugins and themes add their own jobs on top of this baseline. Newsletter plugins schedule digest sends. Backup plugins queue nightly snapshots. SEO plugins refresh sitemaps. Social-sharing tools check for new posts to auto-tweet.

    You can see every scheduled task by installing the WP Crontrol plugin. It lists every job, its recurrence interval, and the function it calls. On a typical site with a dozen active plugins, you’ll find twenty to forty jobs running hourly, daily, or weekly.

    Why it slows your site down

    WordPress cron fires on page load. When a visitor requests a page, WordPress checks if any cron jobs are due. If they are, it spawns a background HTTP request back to itself to process them.

    That works fine for low-traffic blogs. But once you’re running a content site with consistent traffic, you hit two problems:

    Multiple simultaneous triggers. If ten people load your homepage within the same second, WordPress might spawn ten parallel cron processes. Those processes compete for database connections and CPU. Your server slows down. Page load times spike.

    Cron jobs that block rendering. Some poorly-coded plugins don’t spawn the background request correctly. Instead, they run their cron tasks inline—before the page finishes loading. A five-second backup task means a five-second delay before your visitor sees anything.

    The standard fix is to disable WordPress cron entirely and replace it with real server-level cron.

    How to replace it with real cron

    Disabling WordPress cron takes one line in your wp-config.php file:

    define('DISABLE_WP_CRON', true);

    Add that above the line that says “That’s all, stop editing!” and save the file. WordPress will stop checking for due tasks on every page load.

    Now you need to tell your server to run those tasks instead. Most shared hosts and managed WordPress hosts (including BigScoots) let you add cron jobs through cPanel or a similar control panel.

    Create a new cron job that runs every five or ten minutes, pointing to:

    wget -q -O - https://yourdomain.com/wp-cron.php?doing_wp_cron >/dev/null 2>&1

    Or, if your host supports it:

    php /path/to/your/wordpress/wp-cron.php

    The first version uses HTTP to trigger the cron script, just like WordPress does—but on a predictable schedule instead of on every page load. The second version runs it directly via PHP, which is faster and doesn’t consume an HTTP request slot.

    Check your host’s documentation or ask support which syntax to use. Most managed WordPress hosts already handle this for you if you disable WP_CRON in config.

    When to leave WordPress cron enabled

    If your site gets fewer than a hundred visits per day, the default behavior is fine. The overhead is negligible, and you avoid the hassle of configuring server-level cron access.

    If you’re on a staging site or local development environment, leave it on. You need to visit the site to trigger tasks anyway, and setting up real cron for ephemeral environments isn’t worth it.

    But if you’re publishing on a schedule, running automated workflows, or seeing unexplained slowdowns during traffic spikes, disable WP_CRON and hand the job to your server. You’ll get predictable task execution and faster page loads.

    One non-obvious tip: After you switch to real cron, check WP Crontrol again in a week. Some plugins re-register their tasks incorrectly and create duplicates. If you see the same job listed twice with different intervals, delete the duplicate manually. It won’t break anything—the plugin will recreate the correct version on its next run.

    If this helped, subscribe to One Two Three Send for weekly breakdowns of the tools and infrastructure that actually matter when you’re running a content business solo.

  • Analytics event sampling: why your data vanishes above 500K sessions

    Analytics event sampling: why your data vanishes above 500K sessions

    If you’re running a content site that pulls 500,000+ sessions a month, you’ve probably noticed something strange: your GA4 reports don’t always match. Run the same custom report twice, and the numbers shift. Filter by a specific page or traffic source, and suddenly your totals don’t add up.

    You’re not imagining it. You’ve hit GA4’s sampling threshold.

    Sampling means Google is analysing a subset of your data—not all of it—then extrapolating the results. It’s faster for Google to process, but it quietly erodes the accuracy of every decision you make based on those numbers.

    When sampling kicks in (earlier than you think)

    Google’s documentation says GA4 standard properties support up to 10 million events per month before sampling applies. That sounds like plenty of headroom.

    But sampling doesn’t wait until you hit 10 million events. It starts much earlier—often around 500,000 sessions—when you build custom reports, apply filters, or request data outside the standard date range.

    Standard reports (the pre-built ones GA4 ships with) use aggregated data tables and rarely sample. But the moment you:

    • Add a secondary dimension
    • Apply a segment or filter
    • Build an exploration report
    • Request data older than 14 months

    …GA4 switches to on-the-fly querying, and sampling kicks in if your property is processing enough events.

    You’ll see a green badge in the top-right corner of your report that says “This report is based on X% of sessions.” If that number is below 100%, your data is sampled.

    What gets lost in sampled data

    Sampling doesn’t affect every metric equally. High-level numbers—total sessions, pageviews, users—tend to hold up reasonably well even at 20–30% sampling rates.

    But the more specific your question, the worse sampling performs. If you’re trying to:

    • Identify which blog post drove the most newsletter signups from organic search last quarter
    • Compare conversion rates across traffic sources for a specific product page
    • Measure how a site-speed optimisation affected bounce rates on mobile

    …sampling can distort the answer enough to reverse your conclusions.

    I’ve seen sampled reports show a 15% conversion rate on a landing page when the unsampled data (pulled via BigQuery export) showed 11%. That’s not a rounding error—that’s a different business decision.

    How to reduce or avoid sampling

    If you’re consistently hitting sampling in GA4, you have four options.

    Option one: Narrow your date range. Instead of analysing the last six months, break it into monthly or bi-weekly segments. Smaller queries are less likely to sample. You’ll need to stitch the data together manually, but at least it’s accurate.

    Option two: Use the Data API. GA4’s Reporting API gives you access to unsampled data if your query stays within certain limits. Tools like Google Sheets (via the GA4 add-on) or Looker Studio can pull data this way. It’s slower, and there are still daily quotas, but it bypasses the sampling you see in the GA4 interface.

    Option three: Export to BigQuery. GA4 offers a free BigQuery export (up to 1 million events per day). Once your data is in BigQuery, you can query it without sampling. The trade-off: you need to learn SQL, and you’re managing your own data warehouse. But if you’re making six-figure decisions based on this data, it’s worth it.

    Option four: Upgrade to GA4 360. The enterprise tier starts at $50,000/year (sometimes negotiable to $150,000 depending on scale) and raises sampling thresholds significantly. Unless you’re running a seven-figure media operation, this isn’t realistic.

    When sampled data is good enough

    Not every report needs to be unsampled. If you’re checking whether traffic went up or down this week, or whether your top-performing post is still your top-performing post, a 70% sample is fine.

    But if you’re deciding whether to double down on a traffic source, kill a product, or restructure your content strategy, don’t trust a sampled report. Pull the data via API or BigQuery, or narrow your query until the sampling badge disappears.

    The costliest analytics mistake isn’t picking the wrong tool—it’s trusting incomplete data and not knowing it.

    Using GA4 for attribution or conversion tracking? Subscribe to One Two Three Send and get one operator-focused article like this every day.

  • ChatGPT’s memory feature: what it remembers and when to reset it

    ChatGPT’s memory feature: what it remembers and when to reset it

    ChatGPT’s memory feature lets the model remember details across conversations—your business model, your audience, your tone preferences—so you don’t have to repeat context every time you open a new chat.

    In theory, it’s a time-saver. In practice, it can quietly corrupt every output if you’re not paying attention to what it’s storing.

    Here’s how the feature actually works, what gets saved, and when you should delete everything and start fresh.

    How ChatGPT memory works

    When memory is enabled (it’s on by default for Plus and Team users), ChatGPT stores snippets of information you share across sessions. It doesn’t save full transcripts—it extracts facts, preferences, and instructions it thinks will be useful later.

    For example, if you tell ChatGPT you run a weekly newsletter about WordPress hosting, it might remember that. The next time you ask it to write an email subject line, it’ll assume your audience cares about uptime and page speed without you saying so.

    You can view what’s stored by going to Settings → Personalization → Memory. You’ll see a list of bullet points—some you explicitly told it, others it inferred. You can delete individual memories or wipe everything at once.

    Memory is tied to your account, not a specific conversation. If you start a new chat, the model still has access to everything it saved before.

    When memory improves your workflow

    Memory works best when your business model, audience, and output format are stable. If you’re always writing for the same newsletter, using the same voice, and solving the same kinds of problems, memory removes repetitive context-setting.

    Use cases where it helps:

    • Drafting content: You write every Tuesday for a niche audience. ChatGPT remembers the format, tone, and typical topics without a fresh brief.
    • Generating ideas: You ask for post ideas weekly. It recalls your editorial themes and avoids suggesting topics you’ve already covered.
    • Code or automation help: You’re building Zapier workflows or WordPress plugins. It remembers your stack, your naming conventions, and the APIs you use.

    If you’re working solo and your projects don’t shift much, memory reduces cognitive overhead. You get faster first drafts with less prompting.

    When memory pollutes your output

    Memory becomes a problem when context changes but the model doesn’t know it.

    Say you used ChatGPT to write emails for a SaaS product last month. This month, you’re drafting newsletter content for a coaching business. If memory is still active, it might assume your audience is technical, your goal is conversion, and your tone is formal—none of which apply anymore.

    You won’t always notice. The output will feel slightly off—too corporate, too detailed, too salesy—but you might not trace it back to stale memory.

    Other scenarios where memory breaks down:

    • Client work: You’re writing for multiple clients with different voices. Memory blurs the lines unless you manually reset between projects.
    • Experimentation: You’re testing a new content format or audience. Memory anchors responses to what worked before, even when you’re trying something different.
    • Shared accounts: If you’re on a Team plan and multiple people use the same login, memory mixes everyone’s preferences into a confusing mess.

    The worst part: ChatGPT doesn’t tell you when it’s relying on memory. There’s no citation, no flag. It just quietly applies old context to new requests.

    How to manage memory (and when to delete it)

    Check your memory every few weeks. Go to Settings → Personalization → Memory and scan the list. Delete anything that’s outdated, project-specific, or no longer relevant.

    If you switch projects or clients frequently, disable memory entirely. You’ll lose the convenience, but you’ll avoid contaminated outputs. You can toggle it off in the same settings menu.

    If you want memory for some tasks but not others, use Temporary Chat mode (the icon in the sidebar). Conversations in that mode don’t update memory and don’t reference what’s stored. It’s useful for one-off requests or experimenting with a new voice.

    One non-obvious tip: when you do want ChatGPT to remember something, tell it explicitly. Don’t assume it’ll pick up on subtle hints. Say, “Remember: my newsletter audience is non-technical founders, and I always write in second person.” That instruction will stick better than hoping the model infers it from a single example.

    Want more breakdowns like this? Subscribe to One Two Three Send and get one operator-focused article every day—no fluff, no listicles, just tools and tactics that work.

  • Affiliate link cloaking: compliance, tracking, and when to skip it

    Affiliate link cloaking: compliance, tracking, and when to skip it

    Affiliate link cloaking—redirecting yoursite.com/go/product to partnersite.com/?ref=yourID—sounds like good housekeeping. Cleaner URLs, consistent branding, easier tracking. But it introduces technical risk, compliance obligations, and platform dependency that many operators don’t plan for.

    Here’s what actually changes when you cloak links, and when you’re better off leaving them naked.

    What cloaking does (and doesn’t) solve

    Link cloaking replaces long, ugly affiliate URLs with short, branded redirects. Instead of sharing https://convertkit.com?lmref=abc123xyz, you serve yoursite.com/convertkit and 301-redirect behind the scenes.

    The benefit is consistency. Readers see your domain. You can swap the destination URL without editing published content. You centralize click tracking in one place—your own server logs or a plugin like Pretty Links or ThirstyAffiliates.

    What it doesn’t do: improve deliverability, hide the affiliate relationship from networks, or make the link more trustworthy. Email clients still see the final destination after following the redirect. Affiliate networks log the same click. Readers who hover still see the redirect if they check the status bar.

    And you’ve added a round-trip dependency: your server must respond before the affiliate network sees the click. If your host is slow, you’ve introduced latency. If your site goes down, the link breaks entirely.

    FTC disclosure and platform terms

    Cloaking doesn’t exempt you from disclosure rules. The FTC’s Endorsement Guides require clear, conspicuous notice when you earn from a recommendation. A short slug like /go/ or /recommends/ signals commercial intent, but it’s not a substitute for plain-language disclosure near the link.

    Some affiliate programs explicitly prohibit cloaking. Amazon Associates’ Operating Agreement bans link shortening or masking that obscures the final destination. Commission Junction and ShareASale allow it, but require that the redirect preserves tracking parameters and doesn’t mislead users.

    Check your agreement before you automate. Violating terms can mean forfeited commissions or account closure, and most networks won’t warn you—they’ll just stop paying.

    When cloaking makes sense

    If you publish across multiple platforms—blog, newsletter, podcast show notes—and want consistent analytics, cloaking centralizes your data. You can see aggregate clicks in one dashboard instead of stitching together reports from five affiliate portals.

    If you rotate offers or test different partners, cloaking lets you update the destination without republishing old content. A post from 2023 can point to a new tool in 2026 if the /email-tool slug stays the same.

    If you’re building a resource hub or comparison page, branded slugs make the link structure easier to maintain. /bluehost, /siteground, and /bigscoots are more memorable than tracking IDs.

    When to leave links uncloaked

    In email, cloaking adds a redirect that some inbox providers flag. Mailchimp, ConvertKit, and MailerLite preserve click tracking without requiring your own redirect layer. Adding a second hop can increase latency or trigger spam filters if your domain reputation is newer than the affiliate network’s.

    If you’re solo and publishing sporadically, the maintenance overhead isn’t worth it. Cloaking plugins need updates. Redirects need testing. If a slug breaks and you don’t notice for two months, you’ve lost clicks and trust.

    If the affiliate program forbids it, don’t bother trying to hide the relationship. Amazon’s SiteStripe links work fine as-is. Trying to mask them risks more than you gain.

    And if you’re linking to a brand readers already recognize—Stripe, Shopify, Adobe—there’s no branding advantage. stripe.com is more trustworthy than yoursite.com/stripe to someone who’s never heard of you.

    Implementation trade-offs

    WordPress plugins like Pretty Links and ThirstyAffiliates handle the redirect and log clicks in your database. Easy to set up, but you’re querying your own database on every click. High-traffic affiliates can strain shared hosting if you’re not caching redirects.

    Link management tools like Rebrandly or Short.io offload the redirect to their infrastructure. Faster, more reliable, but you’re paying monthly and trusting a third party with your click data. If they change pricing or shut down, you’re migrating hundreds of links.

    Server-level redirects—defined in .htaccess or Nginx config—are fastest and least fragile, but require manual editing every time you add a link. Fine if you have six evergreen affiliate relationships. Unworkable if you’re testing new offers weekly.

    Pick the method that matches your volume and technical comfort. If you’re managing fewer than 20 affiliate links, a plugin is fine. If you’re running a deals site with 200+ partners, invest in dedicated infrastructure or a SaaS redirect service.

    Got a question about affiliate operations, tracking, or compliance? Reply to this email—operator stories make the best future articles.

  • WordPress staging environments: what they protect and what they miss

    WordPress staging environments: what they protect and what they miss

    Most WordPress hosting panels now ship with a one-click staging environment. You spin up a copy of your live site, test a plugin update or theme tweak, and push changes once you’re confident nothing breaks.

    It’s a smart workflow. But staging isn’t a perfect safety net, and treating it like one leads to false confidence and real downtime.

    Here’s what staging environments actually protect you from—and the failure modes they quietly ignore.

    What staging catches reliably

    Staging environments excel at isolating code-level conflicts. If you’re updating a plugin that hasn’t been touched in eighteen months, a staging site will surface PHP errors, broken shortcodes, and layout shifts before they hit your readers.

    You’ll also catch visual regressions. A theme update that changes your header structure or removes a custom CSS class will show up immediately. Same with a page builder update that reformats your landing pages.

    And staging is useful for workflow rehearsal. If you’re migrating from one form plugin to another, or restructuring your permalink settings, you can walk through the entire process without risking your live site’s SEO or user experience.

    Most managed WordPress hosts—BigScoots included—let you clone your production database and files in under a minute. The staging site runs on the same server stack, so you’re testing against a nearly identical environment.

    What staging misses entirely

    Staging environments don’t replicate third-party API behaviour. If your site connects to a payment processor, email service, or analytics platform, those integrations either won’t work in staging (because the API keys are sandboxed) or they’ll work differently (because staging traffic doesn’t match production load).

    You also can’t test caching behaviour accurately. Most staging environments disable caching plugins or CDN layers by default. That means a change that works perfectly in staging might still break when it hits your live site’s edge cache or object cache.

    And staging won’t catch performance problems under real traffic. A database query that runs in 200ms on a staging site with ten test posts might balloon to two seconds on a production site with ten thousand posts and a dozen concurrent users.

    Finally, staging environments don’t protect you from deployment errors. If your host’s push-to-live function skips a file, overwrites a manual edit, or fails to flush the cache, you won’t know until it’s live.

    When to test in staging—and when to skip it

    Use staging for major version updates: WordPress core, your theme, or any plugin that touches your site’s critical path. These are high-risk changes that can break layouts, disable forms, or trigger fatal errors.

    Also use staging for structural changes: switching themes, adding a new page builder, or enabling a plugin that injects code into every page. These changes touch too many files to trust without rehearsal.

    But skip staging for low-risk content edits. If you’re tweaking a blog post, updating a menu link, or uploading a new image, you’re adding friction without reducing risk. Make the change live, check it in an incognito window, and move on.

    And don’t rely on staging for plugin settings changes. Most plugins store settings in the database, and pushing changes from staging to production will either overwrite your live settings or skip them entirely. Test those directly in production—ideally during low-traffic hours.

    The non-obvious tip: test the push itself

    Most hosting platforms offer a “push to live” button that syncs your staging database and files back to production. But that push process isn’t guaranteed to be lossless.

    Before you push a major update, export your live database and store a backup locally. Then push from staging and immediately check three things: your homepage loads, your contact form works, and your most recent blog post displays correctly.

    If any of those fail, you’ll know within seconds—not hours later when a reader emails you.

    And if your host doesn’t offer staging environments, don’t build one manually. The risk of misconfiguring file permissions, breaking symlinks, or syncing the wrong database table outweighs the benefit. Either upgrade to a host that includes staging as a managed feature, or test updates during off-peak hours and keep a recent backup within reach.

    One Two Three Send covers WordPress hosting, email infrastructure, and every other tool solo operators rely on. Subscribe to get one operator-focused article every day—no fluff, no affiliate spam, just the details that matter.

  • Substack Notes vs. LinkedIn posts: which content strategy sticks

    Substack Notes vs. LinkedIn posts: which content strategy sticks

    If you’re running a content business in 2026, you’ve probably been told to post everywhere. But Substack Notes and LinkedIn represent two fundamentally different distribution strategies—and choosing the wrong one wastes time you don’t have.

    Both promise organic reach. Both claim to connect you with your audience. But the mechanics, the audience behavior, and the outcomes differ enough that treating them as interchangeable is a mistake.

    Audience intent: browsing vs. networking

    LinkedIn users open the app to see what’s happening in their professional network. They’re looking for career updates, industry commentary, and light business education. The platform rewards polish and positioning. A well-timed post about a lesson learned or a contrarian industry take can reach tens of thousands of impressions if it hits the algorithm right.

    Substack Notes users are readers first. They’re browsing updates from writers they already follow or discovering new ones through restacks. The feed skews literary, opinionated, and less corporate. A Note performs when it sounds like a person talking to other people—voice matters more than credentials.

    This difference shapes what works. LinkedIn favors declarative statements, clear takeaways, and content that signals expertise. Notes favor texture, specificity, and the kind of observational writing that makes someone want to read more of your work.

    Distribution mechanics: algorithm vs. restack

    LinkedIn’s algorithm optimizes for engagement velocity. If your post gets comments and shares in the first hour, it gets pushed to a wider audience. That means timing matters. Posting at 8 a.m. Eastern on a Tuesday will outperform the same post at 9 p.m. on a Saturday.

    The algorithm also favors native content. Text posts outperform link posts. If you’re driving traffic to your newsletter, you’ll get better reach by posting the insight directly on LinkedIn and mentioning the newsletter in a comment, rather than leading with a link.

    Substack Notes works differently. Distribution is driven by restacks—essentially retweets—and by how many of your subscribers have the Substack app installed. If your list is small or your readers don’t use the app, your Notes won’t travel far. But if your audience is active on Substack, a single restack from a popular writer can send your Note to thousands of new readers.

    Notes also lack an algorithmic feed in the traditional sense. They’re chronological within the subset of people you follow and discover. That makes timing less critical but makes your existing network more important.

    Conversion behavior: who subscribes?

    LinkedIn traffic tends to bounce. A viral post can send thousands of profile views, but converting those views into newsletter subscribers requires a very clear call-to-action and a compelling reason to leave the platform. Most LinkedIn users treat the platform as a feed, not a gateway.

    Substack Notes traffic converts better because the action you’re asking for—subscribe to this writer—is native to the platform. If someone likes your Note, subscribing is one tap. The friction is lower, and the context is already literary.

    That said, LinkedIn’s audience is larger and less saturated. A well-executed content strategy there can build authority and inbound opportunities that don’t require newsletter conversion—consulting leads, partnership inquiries, speaking invitations.

    Which platform to prioritize

    If your business model depends on growing a subscriber base quickly and you’re already writing regularly, prioritize Notes. The conversion path is shorter, and the audience is primed to subscribe. Spend 10 minutes a day sharing observations, restacking writers you admire, and engaging with your audience there.

    If your business model depends on authority and inbound opportunities—if you’re positioning yourself as an expert, building a personal brand, or selling services—LinkedIn is the better long-term play. Post two to three times a week, optimize for the algorithm, and treat the platform as top-of-funnel awareness, not direct conversion.

    Most indie operators don’t have time for both. Pick the one that aligns with how you make money, and ignore the other until you’ve exhausted the first.

    Want more comparisons like this? Subscribe to One Two Three Send and get operator-focused breakdowns of the tools and tactics that actually move the needle.

  • Stop paying for recurring subscriptions you forgot about

    Stop paying for recurring subscriptions you forgot about

    Most solo operators running online businesses are paying for between three and seven software subscriptions they either forgot about or no longer need. The average waste sits between $80 and $200 per month — enough to cover a year of decent hosting or a professional email service.

    This isn’t about extreme frugality. It’s about operational hygiene. Every unused subscription is a small leak in your business, and those leaks compound over time. Here’s how to audit your stack, cut the bloat, and build a system that prevents it from creeping back.

    Pull your transaction history from every payment method

    Start with your credit cards, PayPal, and any business accounts you use for software purchases. Download the last six months of transactions and filter for anything that repeats monthly or annually.

    Look for:

    • Charges under $20 — these are easy to miss and often auto-renew without warning.
    • Annual renewals you forgot about. A $200 charge in May for a tool you stopped using in February hurts twice.
    • Services billed through aggregators like Paddle or FastSpring, which obscure the vendor name on your statement.

    If you use a tool like Stripe for your own revenue, check your outgoing subscriptions too. Some operators set up recurring payments for white-label services or API access and forget they’re still active.

    Match every charge to a current use case

    Open a spreadsheet. List every recurring charge, the amount, the billing cycle, and — most importantly — the last time you actually used it.

    For each subscription, ask:

    • Have I logged in during the past 30 days?
    • Does this tool solve a problem I still have?
    • Could I replace this with a free alternative or a tool I’m already paying for?

    Common offenders include:

    • Design tools you used once for a logo refresh (Canva Pro, Adobe Creative Cloud).
    • SEO or analytics platforms you check twice a year (Ahrefs, Semrush).
    • Social media schedulers for platforms you stopped posting to (Buffer, Publer).
    • AI assistants you signed up for during a launch, then replaced with something else.

    If you haven’t touched it in 60 days and can’t articulate a specific upcoming use case, kill it.

    Downgrade before you cancel

    Some tools offer free tiers that cover 80% of what you need. Before you cancel outright, check if a downgrade makes sense.

    Examples:

    • Most email platforms (MailerLite, Brevo, Beehiiv) have generous free plans for lists under 1,000 subscribers.
    • Analytics tools like Plausible and Fathom offer lower-tier plans if you’re tracking fewer than 10,000 monthly pageviews.
    • Hosting providers often let you move to a cheaper plan if your traffic dropped or you consolidated sites.

    Downgrading keeps your account active, preserves your data, and gives you a fallback if you need to scale back up. Canceling outright sometimes means losing historical data or having to re-integrate from scratch later.

    Set a calendar reminder to repeat this every quarter

    Subscription bloat isn’t a one-time problem. New tools creep in during launches, experiments, or when you’re troubleshooting something urgent. Three months later, you’ve forgotten why you signed up.

    Block 30 minutes every quarter to repeat this audit. Use the same spreadsheet. Update your current charges, check usage, and cut anything that’s drifted out of your workflow.

    If you’re using a tool like Notion or Airtable to manage your business operations, add a “Software Stack” table with columns for cost, renewal date, and last-used date. Set up an automation (via Zapier or Make) to flag anything that hasn’t been marked “used” in 45 days.

    One rule to prevent future bloat

    Before you sign up for any new paid tool, add a note in your calendar for 60 days out: “Still using [Tool Name]?”

    If the answer is no, cancel before the second billing cycle hits. Most SaaS tools hook you with a generous trial or a strong first-month use case, then fade into the background as your workflow shifts. The 60-day check catches that drift before it costs you six months of fees.

    Running lean doesn’t mean running cheap. It means every dollar you spend has a job. If a tool isn’t doing that job, cut it and redirect the budget to something that moves your business forward.

    Want more operator-focused breakdowns like this? Subscribe to One Two Three Send and get one article like this in your inbox every week — no fluff, no filler, just the tools and tactics that matter for solo operators running content businesses.

    Heads up — some links in this article are affiliate links. If you sign up through them, we may earn a small commission at no extra cost to you. We only recommend tools we use ourselves.
  • ConvertKit’s subscriber score: how it ranks engagement and why it’s wrong

    ConvertKit quietly calculates an engagement score for every person on your list. It’s a single number—0 to 100—that’s supposed to tell you who cares and who doesn’t. The platform uses it to sort subscribers in reports, flag cold contacts, and guide re-engagement decisions.

    Most operators never look at it. The ones who do often misread what it measures—and make pruning or segmentation calls based on incomplete signals.

    Here’s what the score actually tracks, when it’s useful, and where it leads you astray.

    What drives the score

    ConvertKit’s engagement score weighs three behaviors:

    • Opens: How often a subscriber opens your emails in the past 90 days.
    • Clicks: How often they click links inside those emails.
    • Recency: How recently they’ve done either.

    Opens carry the most weight. A subscriber who opens every email but never clicks will score higher than someone who clicks occasionally but skips half your sends. Recency acts as a multiplier—someone who opened yesterday gets a bump over someone who opened 80 days ago, even if their long-term open rate is identical.

    The score doesn’t consider:

    • Whether they bought something
    • Whether they replied to an email
    • Whether they visited your site via a link (unless they also clicked in the email)
    • How long they’ve been subscribed

    It’s a deliverability proxy, not a business metric. ConvertKit designed it to help you identify contacts who hurt your sender reputation—not contacts who drive revenue.

    When the score matters

    The score is useful in two narrow scenarios.

    Pre-pruning cold contacts. If you’re preparing to scrub your list, sort by engagement score and review everyone below 20. These are the people who haven’t opened or clicked in months. Removing them improves your open rate and keeps inbox providers from flagging your domain. Just don’t auto-delete based on score alone—check signup date and source first. A subscriber who joined two weeks ago and hasn’t engaged yet isn’t cold; they’re new.

    Segmenting for re-engagement campaigns. Run a win-back sequence to subscribers scoring 10–30. They’re not dead, but they’re fading. A subject line refresh, a content pivot, or a simple “still interested?” email can pull them back. Anyone below 10 is harder to recover and may not be worth the send cost.

    Where the score misleads

    The engagement score breaks down when you treat it as a proxy for value.

    High scorers aren’t always your best subscribers. Someone who opens every email but never buys, never replies, and never shares your work scores higher than someone who buys twice a year but only opens when they need something. ConvertKit can’t see purchase behavior unless you tag it manually—and even then, it doesn’t factor into the score.

    Low scorers aren’t always dead weight. Plenty of valuable subscribers skim subject lines in their inbox and only open when a topic hits. They might visit your site directly, bookmark your archive, or consume your content via RSS. Their engagement score tanks, but they’re active in ways the platform can’t measure.

    The 90-day window hides seasonality. If you run a tax-prep newsletter, subscribers who engage in February and March will score poorly in June—even though they’re likely to come back next year. A hard cutoff at 90 days doesn’t account for cyclical engagement.

    What to use instead

    If you want to identify your most valuable subscribers, layer in context the score doesn’t capture:

    • Tag purchases and replies. Create segments for buyers and people who’ve replied to a broadcast. These are your highest-intent contacts, regardless of open rate.
    • Track link clicks by type. ConvertKit lets you filter by clicked link. Someone who clicks affiliate links or product pages is more valuable than someone who clicks every “read more” button.
    • Monitor unsubscribe timing. If low-engagement subscribers stick around for months without unsubscribing, they’re choosing to stay. That’s signal, even if they’re not opening.

    The engagement score is a starting point, not a verdict. Use it to spot patterns, but don’t let it override what you know about how your audience actually behaves.

    Want more tool breakdowns like this? Subscribe to One Two Three Send for weekly deep-dives on the features that shape how you run your online business—no fluff, just the mechanics that matter.