
Category: Newsletters

  • Substack’s Section feature: when to split your newsletter

    Substack’s Section feature: when to split your newsletter

    Substack's Section feature: when to split your newsletter
    Photo by Markus Winkler on Unsplash

    Substack’s Section feature lets you run multiple newsletters under a single publication. Each Section has its own name, subscription toggle, and archive page—but everything lives under one domain and subscriber dashboard.

    Most operators discover Sections when they want to add a secondary content stream without fragmenting their audience or managing two separate Substacks. The feature works, but only if you understand what it actually controls and what it doesn’t.

    How Sections work

    When you create a Section, you’re adding a category filter to your publication. Subscribers can opt in or out of each Section independently. A reader might subscribe to your main newsletter but skip your weekly link roundup, for example.

    Each post you publish gets assigned to one Section. Your homepage feed shows all posts by default, but readers can filter by Section using the navigation menu. Each Section gets its own RSS feed and archive URL.

    Sections don’t create separate subscriber lists—everyone is still subscribed to your publication. The Section toggle just controls which emails they receive. Your total subscriber count remains unified, and free vs. paid status applies across all Sections.

    This matters for billing. If you have 5,000 subscribers but only 1,000 opted into your premium Section, you’re still paying for 5,000 subscribers. Substack doesn’t prorate based on Section engagement.

    When to use Sections

    Sections make sense when you want to publish different content formats or cadences without forcing every subscriber to receive everything.

    Common use cases: a weekly main newsletter plus a daily news brief; a free newsletter with a paid-only deep-dive Section; a primary topic with a secondary niche that overlaps but doesn’t fully align.

    Sections don’t work well if your content streams target completely different audiences. A marketing newsletter and a cooking newsletter should be separate publications, not Sections. Substack’s discovery and recommendation algorithms treat your publication as a single entity—readers who find you through one Section will see the rest.

    Sections also don’t solve the problem of list fatigue. If subscribers are tuning out, adding more Sections usually makes it worse. You’re better off consolidating or changing your primary content strategy.

    The non-obvious filtering tip

    Substack’s subscriber export includes a sections column that lists which Sections each subscriber has enabled. Most operators ignore this field, but it’s useful for segmentation.

    You can filter your CSV export to find subscribers who opted into one Section but not another. This tells you which content streams resonate and which don’t. If 80% of your subscribers turned off your link roundup Section, that’s a signal to kill it or rework the format.

    The export also shows Section opt-in dates, so you can track adoption over time. If a new Section isn’t attracting opt-ins after 30 days, it’s probably not differentiated enough from your main feed.

    One edge case: Substack doesn’t let you set default Section subscriptions for new subscribers. Everyone who signs up is automatically opted into all Sections. You can’t onboard new readers into just your free Section and gate the premium one—they get everything unless they manually toggle it off.

    This means your welcome email needs to explain what each Section is and how to manage preferences, or you’ll see higher unsubscribe rates from people who didn’t expect the volume.

    Section limitations

    Sections don’t have separate branding. The header, logo, and colour scheme apply to your entire publication. If you want each Section to feel visually distinct, you’re limited to post-level formatting.

    You also can’t schedule posts to different Sections at the same time. Substack’s scheduler works at the publication level, so if you want to send your main newsletter and a bonus Section on the same day, you’ll need to stagger the send times manually.

    Paid subscriptions apply across all Sections—you can’t charge separately for individual Sections. If you want to monetise one Section independently, you’d need a second Substack publication.

    Sections work best when your content streams share a core audience but vary in format, frequency, or depth. If you’re running a single newsletter and considering expansion, Sections are worth testing—but only if you’re prepared to let subscribers self-select out of the extra volume.

    Using Substack or considering it? Subscribe to One Two Three Send for more breakdowns of newsletter platform features that actually matter.
  • Most subscription forms ask for too much data—here’s the cutoff

    Most subscription forms ask for too much data—here’s the cutoff

    Most subscription forms ask for too much data—here's the cutoff

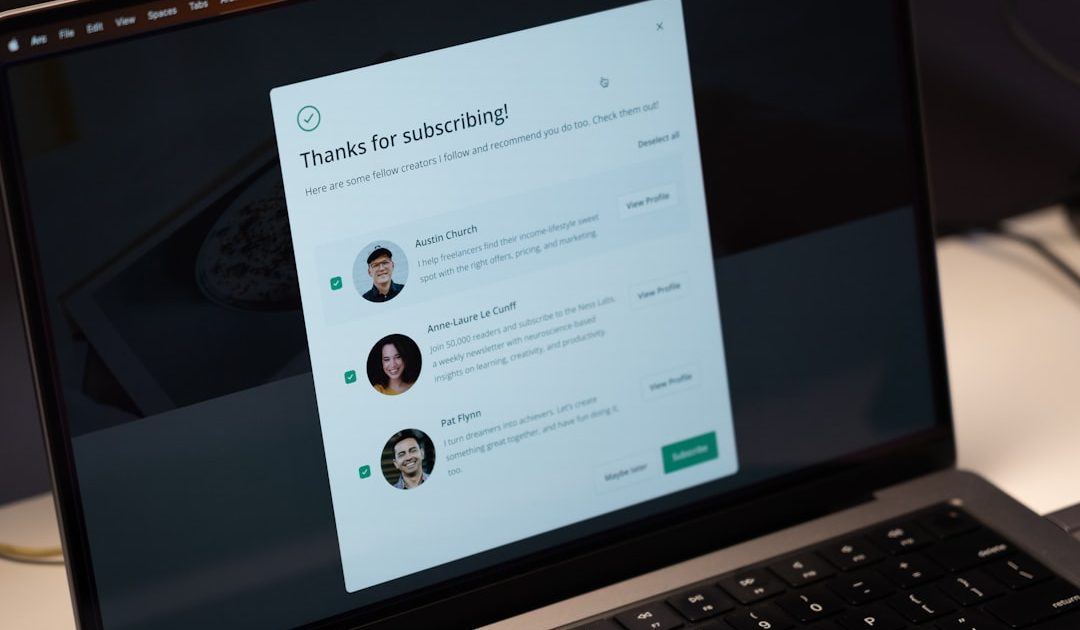
    Every field you add to a subscription form costs you subscribers. The question isn’t whether that’s true—it’s how much it costs, and whether the data you collect is worth it.

    Most operators inherit form designs from platforms or copy what they see elsewhere. They ask for first name, last name, company, role, and sometimes more. Then they wonder why their landing page converts at 2% when competitors hit 8%.

    The math is simple: each additional field drops conversion by 10–25%, depending on placement and perceived friction. A three-field form converts 30–40% worse than a single-field form. If you’re getting 1,000 visitors a month, that’s the difference between 80 subscribers and 40.

    What to collect upfront

    Email address. That’s it for most operators.

    If you run a B2B newsletter where segmentation drives your entire content strategy—industry-specific tips, role-based workflows—then one additional field makes sense. A dropdown for industry or job function. Not both.

    First name feels harmless, but it’s still friction. If you’re using it only for personalization in the welcome email, test a version without it. Many operators find the conversion lift from removing it outweighs the marginal engagement bump from “Hi Sarah” instead of “Hi there.”

    Behavioral segmentation beats form segmentation. You can infer interest from what someone clicks, downloads, or reads. You can’t infer it from a dropdown they picked to get past your gate.

    What to ask later—and when

    Once someone’s subscribed, you have permission to ask more. But timing matters.

    The best window is 7–14 days after signup, once they’ve opened two or three emails and decided your content is worth keeping. Send a one-question survey: “What’s your biggest challenge with [topic]?” or “What type of content do you want more of?”

    Don’t embed the survey in the email. Link to a single-question form—Tally, Typeform, or a plain Google Form. Keep it to one question. Multi-question surveys in this context get 15–20% completion; single-question surveys get 40–60%.

    Use progressive profiling if your platform supports it. Beehiiv, ConvertKit, and Brevo all let you show different questions to subscribers based on what you already know. If someone clicked three AI-tools posts, you don’t need to ask if they’re interested in AI tools.

    The drop-off math that matters

    Run the numbers for your own funnel. If you’re getting 500 visitors a month to your signup page and converting at 4% with a two-field form, that’s 20 subscribers. Cut it to one field and conversion jumps to 6%—that’s 30 subscribers, a 50% lift.

    If you’re running paid traffic, every field costs you real money. A $10 CPM on 10,000 impressions is $100. If your landing page converts at 3%, you’re paying $3.33 per subscriber. Bump that to 5% and it drops to $2. Over a year, that’s hundreds or thousands of dollars depending on scale.

    Most platforms report form abandonment, but not field-level abandonment. If you want to see where people drop off, use Hotjar or Microsoft Clarity and watch session recordings. You’ll see people type an email, pause at the “Company” field, and leave.

    When more fields make sense

    There are exceptions. If you’re running a high-ticket funnel—consulting, enterprise software, $2,000+ courses—you want friction. A five-field form filters out tire-kickers and signals intent. Your goal isn’t volume; it’s quality.

    If you’re offering a lead magnet that’s segmented by use case—”Download the SaaS pricing guide” vs. “Download the agency pricing guide”—you need to know which one they want. But that’s still one extra field, not three.

    If you’re required to collect consent checkboxes for GDPR or sector-specific compliance, you’re stuck with them. But don’t add more optional fields on top of mandatory ones.

    Test it yourself

    Run a 50/50 split test for two weeks. Clone your signup page, remove every field except email, and send half your traffic to each version. Most email platforms let you A/B test signup forms directly—MailerLite and Beehiiv both support it natively.

    Track conversion rate, not just subscriber count. If your traffic fluctuates week to week, raw numbers will mislead you.

    If you don’t have enough traffic to get statistical significance in two weeks—say, under 200 visitors—run it for a month. Don’t flip-flop based on three days of data.

    Want more breakdowns like this? Subscribe to One Two Three Send and get one operator-focused article every day—no fluff, just the technical details that matter.

    Heads up — some links in this article are affiliate links. If you sign up through them, we may earn a small commission at no extra cost to you. We only recommend tools we use ourselves.

  • ConvertKit vs. Brevo vs. MailerLite: free tier caps and billing surprises

    Most solo operators start with a free email platform tier and assume they’ll upgrade when subscriber count crosses the threshold. Reality: you’ll hit a different limit first—and the platform will lock or bill you before you notice.

    Here’s what actually ends the free ride on three popular platforms, and what you need to watch besides subscriber count.

    ConvertKit: 1,000 subscribers, but sends matter more

    ConvertKit’s free tier caps at 1,000 subscribers. Clean enough. But the real constraint is the broadcast limit: you can send to your entire list once per day. Automations don’t count against this, but any manual broadcast does.

    If you publish daily, you’re fine. If you send a Monday newsletter, a Wednesday product launch, and a Friday recap? You’ll hit the send wall mid-week, and ConvertKit will prompt you to upgrade or wait 24 hours.

    The free tier also strips out advanced reporting. You get open rates and click rates, but no link-level breakdowns, no subscriber timezone data, and no A/B test variants. For most operators under 1,000 subscribers, that’s acceptable. For anyone testing subject lines or running cohort experiments, it’s a blocker.

    Paid plans start at $15/month for up to 300 subscribers (previously $9 in 2024, increased January 2025), then jump in $10–$15 increments as you grow. The 1,001–1,500 bracket costs $29/month. Billing is monthly by default; annual saves roughly 15%.

    Upgrade trigger: You’ll outgrow the single daily send limit before you outgrow 1,000 subscribers—especially if you batch content or run launch sequences.

    Brevo: unlimited contacts, but sends cap at 300/day

    Brevo (formerly Sendinblue) flips the model. The free tier allows unlimited stored contacts but caps you at 300 emails per day. Not 300 per broadcast—300 total sends, across all automations, transactional messages, and campaigns combined.

    If your list is 400 people and you send a single broadcast, you’ll burn your daily budget and leave 100 subscribers undelivered until tomorrow. Brevo queues the remainder automatically, but your “send now” broadcast becomes a two-day trickle.

    This structure works if your list is large but inactive, or if you’re using Brevo primarily for transactional email (order confirmations, password resets) and occasional campaigns. It breaks fast for anyone publishing on a schedule.

    The entry paid tier is $9/month for 5,000 sends. After that, Brevo bills by send volume, not subscriber count: 10,000 sends costs $18/month, 20,000 sends costs $27/month. If you send daily to 2,000 subscribers, you’ll pay for 60,000+ sends per month—around $49/month.

    Upgrade trigger: Daily send volume, not list size. A 500-subscriber list publishing five times a week will need paid access within two weeks.

    MailerLite: 1,000 subscribers, 12,000 emails/month

    MailerLite’s free tier combines both caps: up to 1,000 subscribers and up to 12,000 emails sent per month. That’s roughly 12 sends to your full list, or 3 sends per week if you’re at cap.

    The dual limit is easier to predict than Brevo’s daily throttle, but it penalizes frequent senders. If you publish twice a week and run a 4-email welcome automation, you’ll chew through 10,000+ sends monthly even with 800 subscribers.

    MailerLite’s free tier includes A/B testing (subject line only), basic segmentation, and landing page builders—more than ConvertKit offers for free, less than Brevo’s CRM-adjacent features.

    Paid plans start at $9/month for up to 500 subscribers (increased from $10/month for 1,000 in mid-2025), then scale in $5–$10 steps. The 1,001–1,500 bracket costs $18/month. Billing is monthly; annual plans save 30%, one of the steeper discounts in this category.

    Upgrade trigger: Monthly send volume if you publish frequently, subscriber count if you grow fast but send infrequently.

    What actually forces the upgrade

    Across all three platforms, the advertised subscriber cap rarely matches the real constraint:

    • ConvertKit: broadcast frequency
    • Brevo: daily send ceiling
    • MailerLite: monthly send budget

    If you’re starting out, assume you’ll need paid access once you cross 500 active subscribers and publish more than twice a week. The free tier math breaks earlier than the marketing page suggests.

    One more gotcha: all three platforms count failed sends (hard bounces, spam complaints) toward your monthly or daily limit. A stale list will burn through your budget faster than a clean one.

    If you’re already on a free tier and approaching limits, audit your unengaged segment now. Removing inactive subscribers before you hit the cap can buy you another month or two—and lower your first paid bill when you do upgrade.

    Want more operator-focused breakdowns like this? Subscribe to One Two Three Send for tools, tactics, and pricing reality checks—no fluff, no sponsorships, just what works.

    Heads up — some links in this article are affiliate links. If you sign up through them, we may earn a small commission at no extra cost to you. We only recommend tools we use ourselves.

  • Transactional email rate limits: when your invoices queue for hours

    Transactional email rate limits: when your invoices queue for hours

    Transactional email rate limits: when your invoices queue for hours
    Photo by CHUTTERSNAP on Unsplash

    Transactional email services advertise instant delivery, but nearly every provider enforces rate limits you don’t see until you hit them. When your WordPress site queues 200 password reset emails during a product launch, or your payment processor triggers 150 invoice emails in ten minutes, those messages don’t all send immediately—they stack in a queue, and some users wait 20 minutes for a confirmation that should arrive in seconds.

    Rate limits exist to protect sender reputation and prevent abuse, but the default caps are lower than most operators expect. If you’re running a content business with any spike traffic—course enrollments, flash sales, member signups—you need to know where your transactional provider throttles, and what happens when you exceed it.

    Where rate limits hide

    Postmark caps free-tier accounts at 10 emails per second, which sounds generous until you calculate it: 600 emails per minute, 36,000 per hour. If you’re sending order confirmations during a product launch and processing 400 transactions in fifteen minutes, you’re fine. But if your WordPress install also queues comment notifications, password resets, and admin alerts through the same API key, those all count toward the same limit.

    Mailgun’s free tier allows 100 emails per hour—3.6 seconds per message if you max it out. That’s sufficient for a solo blog with light transactional volume, but it breaks the moment you add a membership plugin that emails welcome sequences or sends bulk password resets after a database migration.

    SendGrid enforces a default limit of 600 emails per day on free accounts, and 100 per hour on some paid tiers unless you request an increase. The daily cap resets at midnight UTC, not your local timezone, so if you launch a paid product at 11 PM Eastern and process 200 sales before 12 AM UTC, you’ll hit the limit and queue the rest until the next day.

    What queuing actually does

    When you exceed a rate limit, most transactional providers queue your emails and release them gradually. Postmark holds messages in a send queue and drips them out at the max rate; users see a 5–10 minute delay for emails sent during a spike. Mailgun does the same, but queues can extend to 30 minutes if you’re on a free tier during high-traffic periods across their network.

    The problem isn’t the queue itself—it’s that your application doesn’t know about it. WordPress confirmation plugins assume emails send instantly, so users refresh their inbox, check spam, then contact support. Your transactional dashboard shows all messages as “accepted,” but the timestamp reflects when the email entered the queue, not when it actually delivered.

    Some providers reject emails that exceed the rate limit outright. SendGrid returns a 429 error, and unless your application retries the API call, the email never sends. Most WordPress SMTP plugins don’t retry by default; they log a failure and move on. You won’t know an invoice email failed unless you manually check logs or a customer complains.

    How to audit your current limit

    Log into your transactional email dashboard and look for “account limits” or “sending rates” under settings or billing. Postmark lists it on the account overview page. Mailgun buries it under “Account Settings → Sending” and labels it “hourly sending limit.” SendGrid shows daily and hourly caps under “Settings → Account Details.”

    If you can’t find the limit documented, send a test batch. Queue 150 emails through your transactional API in under one minute using a script or a WordPress plugin like WP Mail SMTP’s test tool, then watch your dashboard. Check the “sent” timestamps—if they spread across 10–15 minutes, you hit a throttle.

    Compare your rate limit to your actual transactional volume. Pull your email logs for the last 30 days and calculate your peak hourly send rate. If your highest spike was 220 emails in one hour and your provider caps you at 100, you’re queuing messages during every launch or enrollment period.

    When to upgrade vs. switch

    Most transactional providers let you request a rate limit increase on paid plans. Postmark raises limits to 70 emails per second (252,000 per hour) on their $15/month tier. Mailgun increases hourly caps to 10,000 on paid accounts. SendGrid adjusts daily limits to 40,000+ once you’re on a $20/month plan and submit a support ticket.

    If you’re already on a paid plan and still hitting limits during normal operations, switch providers. A $20/month plan that queues invoices for 20 minutes during a product launch costs more in lost sales and support time than a $50/month plan that delivers instantly.

    Postmark is the cleanest option for operators who need reliable transactional delivery without rate-limit surprises. The interface is operator-friendly, the docs explain limits up front, and you can monitor queue depth in real time.

    Check your transactional provider’s dashboard today. Find your rate limit, compare it to your peak send volume, and decide whether you need an upgrade before your next product launch. If you’re not sure where to start, reply with your monthly transactional volume—I’ll tell you which tier makes sense.

  • ConvertKit automation filters stack in reverse order—here’s how

    ConvertKit’s visual automation builder looks intuitive—drag a few boxes, connect some arrows, add a filter or two, and you’re done. But there’s a non-obvious quirk in how the platform evaluates filter conditions that trips up even experienced operators: filters stack in reverse order.

    If you’ve ever set up an automation rule with multiple conditions and watched subscribers either flood through when they shouldn’t or fail to trigger when they should, this is the mechanic that explains it.

    How filter stacking actually works

    ConvertKit evaluates conditions from the bottom of your filter list upward, not top-to-bottom like you read. If you add three conditions—say, “has tag A,” “does not have tag B,” and “signed up more than 7 days ago”—the platform checks the bottom condition first, then works its way up.

    This matters when you’re using AND/OR logic. A rule that reads clearly in your head when stacked top-to-bottom can behave completely differently when evaluated in reverse.

    Here’s a concrete example: you want to send a product launch email only to subscribers who opened your last broadcast and don’t already own the product. You add two filters:

    • Top filter: Opened broadcast “Pre-launch Teaser”
    • Bottom filter: Does not have tag “Customer”

    ConvertKit checks the “Customer” tag first. If that passes, it checks the open. But if you’re using OR logic somewhere in the stack, the sequence can fire for anyone without the tag—even if they never opened the email.

    The fix is to reverse your mental model: build filters from the bottom up, with your most restrictive condition at the top of the list.

    When this breaks automations silently

    The stacking order doesn’t throw an error. Your automation just underperforms, and you won’t know why unless you manually trace a few subscriber paths.

    Common failure modes:

    • Welcome sequences fire for existing customers. You added a “new subscriber” filter at the top, but an OR condition lower in the stack lets tagged users through.
    • Upsell emails go to people who already bought. You filtered for “does not have tag X,” but a date-based condition evaluated first and passed everyone through.
    • Re-engagement campaigns trigger immediately. You set “inactive for 30 days” at the top, but ConvertKit checked a different condition first and started the sequence early.

    These bugs don’t show up in the builder UI. The visual flow looks correct. But the logic runs backward.

    How to audit your existing automations

    Open each automation rule and list your filters on paper, bottom to top. Then walk through the logic as ConvertKit would execute it. Ask:

    • Does the bottom condition pass the right people?
    • If yes, does the second-to-bottom refine or expand that group?
    • Are any OR statements letting in subscribers you didn’t intend?

    If you’re using more than three filters, consider splitting the automation into two rules. ConvertKit’s AND/OR toggle applies to the entire stack, so complex logic gets hard to reason about fast.

    For high-stakes sequences—product launches, course enrollments, refund follow-ups—test with a single subscriber first. Tag yourself, trigger the automation manually, and confirm you land in the right sequence at the right time.

    One non-obvious workaround

    If you need granular control and can’t get the filter stack to behave, move your logic into tags instead of filters. Create a dedicated tag that represents the exact subset of subscribers you want to target, then use a separate automation to apply that tag based on behavior.

    For example, instead of filtering for “opened email A AND does not have tag B AND signed up more than 7 days ago,” create a tag called “Launch-Eligible” and use one automation to apply it when all three conditions are true. Then trigger your launch sequence with a single filter: “has tag Launch-Eligible.”

    It’s an extra step, but it eliminates ambiguity. You’re offloading the logic from ConvertKit’s filter stack into a tagging rule you control, and the sequence itself becomes a simple on/off switch.

    This approach also makes debugging faster. If someone didn’t receive the email, you check whether they have the tag. If they don’t, you trace back through the tagging automation to see which condition failed.

    ConvertKit’s automation builder is powerful, but the reversed filter evaluation is a sharp edge. Once you know how it works, you can design around it. Until then, it’s easy to ship a sequence that looks right but runs wrong.

    Got a ConvertKit automation that’s misbehaving? Reply with the filter setup—I’ll walk through how the platform is likely evaluating it.

  • Newsletter subscriber churn happens in silence—measure it weekly

    Newsletter subscriber churn happens in silence—measure it weekly

    Newsletter subscriber churn happens in silence—measure it weekly
    Photo by Brett Jordan on Unsplash

    Most newsletter operators check their unsubscribe count once a month, usually when they’re reconciling their ESP bill or prepping a performance report. By then, any spike is historical. You can’t remember what you sent three Tuesdays ago, let alone correlate a content decision with a drop in subscribers.

    Churn happens in real time. Your ability to learn from it degrades exponentially with delay.

    If you want to understand what makes readers leave—and what keeps them—you need to measure churn weekly, ideally within 48 hours of each send. Here’s how to set that up, what benchmarks matter, and what silent churn actually costs you.

    What churn rate actually measures

    Churn rate is the percentage of your list that unsubscribes (or gets suppressed) in a given period. The formula is simple:

    Churn rate = (unsubscribes + bounces + spam complaints) / total subscribers at start of period

    Most platforms show you gross unsubscribe count. That’s useless without context. A list of 500 losing 5 subscribers is a 1% churn rate. A list of 10,000 losing 50 is 0.5%. The smaller list has double the problem.

    For solo operators and small teams, a healthy monthly churn rate sits between 0.5% and 2%. That translates to roughly 0.1%–0.5% per send if you’re mailing weekly. Above 0.75% per send, something’s broken—either your content, your targeting, or your acquisition source.

    But monthly averages hide the story. A 2% monthly churn could mean steady 0.5% weekly attrition, or it could mean one catastrophic send at 8% followed by three quiet weeks. You need the breakdown.

    Set up a weekly churn dashboard

    Most ESPs don’t surface per-send churn in an obvious place. You’ll need to pull it manually or script it.

    In Beehiiv, go to each broadcast’s performance tab and note unsubscribes. Divide by your subscriber count at send time. Log it in a spreadsheet: date, subject line, unsubscribes, churn rate.

    In MailerLite, the campaign report shows unsubscribes per send. Export weekly and calculate rate yourself. The platform doesn’t auto-calculate churn percentage.

    In ConvertKit, open the broadcast, scroll to “Unsubscribed,” and divide by total sent. You’ll need to do this manually for each send.

    For transactional senders using Postmark, churn tracking is trickier—you’re not broadcasting, so attrition shows up as suppression list growth over time. Check your suppression report weekly and compare it to your active recipient count.

    Build a simple table: Send date | Subject | Subscribers at send | Unsubscribes | Churn % | Notes. The “Notes” column is where you log what was different: new content format, guest post, sales pitch, topic shift.

    What the numbers reveal

    Once you have four to six weeks of per-send churn data, patterns emerge.

    If churn spikes above 0.75% on a specific send, dig into the subject line and content. Was it off-topic? Too salesy? Did you mail twice in three days? Subscribers tolerate inconsistency poorly.

    If churn is flat but elevated—say, 0.6% every week—you have an acquisition problem, not a content problem. You’re attracting the wrong people, or your welcome sequence isn’t setting expectations. Check where new subscribers come from. Freebie-seekers and giveaway entrants churn fast.

    If churn is erratic—0.2% one week, 1.1% the next, 0.3% after that—you don’t have a consistent content thesis. Readers don’t know what to expect, so they bail when surprised.

    The silent cost of churn isn’t just lost readers. It’s deliverability erosion. High unsubscribe rates signal to inbox providers that your mail isn’t wanted. That compounds: your open rate drops, engagement falls, and future sends land in promotions or spam. A 1% monthly churn rate costs you roughly 12% of your list annually, but the deliverability hit costs you another 5–10% in effective reach.

    When to act on churn data

    Don’t overreact to a single bad send. Churn happens. But if you see two consecutive sends above 0.75%, or a four-week average above 0.5%, change something.

    Common fixes: tighten your welcome sequence to filter out freebie-hunters. Segment your list and stop mailing unengaged subscribers every week. Audit your lead magnets—if you’re promising one thing and delivering another, churn starts at signup. Test a weekly digest format instead of multiple sends. Cut sponsor placements that feel jarring.

    Track churn for eight weeks after any change. If it drops, you found the lever. If it doesn’t, revert and test something else.

    Churn is the tax you pay for growth. But silent churn—churn you don’t measure until it’s too late—is the tax you pay for inattention.

    Want more operator-to-operator breakdowns like this? Subscribe to One Two Three Send for weekly deep dives on the tools, tactics, and trade-offs that matter when you’re running a content business solo.

    Heads up — some links in this article are affiliate links. If you sign up through them, we may earn a small commission at no extra cost to you. We only recommend tools we use ourselves.

  • Substack Notes vs. Beehiiv Boosts: when distribution costs more than it delivers

    Substack Notes vs. Beehiiv Boosts: when distribution costs more than it delivers

    Substack Notes vs. Beehiiv Boosts: when distribution costs more than it delivers
    How Facebook tests every new post on 200 strangers before deciding whether to push it.

    Newsletter platforms now bundle distribution features—Substack Notes, Beehiiv Boosts, Ghost recommendations, ConvertKit’s Creator Network. The pitch is similar across all of them: publish once, reach thousands of subscribers who don’t already follow you, grow faster than organic alone.

    The reality is more nuanced. These discovery engines work differently, charge different tolls, and suit different operator profiles. If you picked your ESP based on deliverability and pricing tiers, you probably didn’t model the cost—or effectiveness—of their built-in growth levers.

    Here’s what each system actually does, what it costs in time and money, and when the tradeoff makes sense.

    Substack Notes: engagement tax, zero cash cost

    Substack Notes functions as a short-form feed inside the Substack ecosystem. Writers post updates, threads, images, or links; readers see them if they follow the writer or if Substack’s algorithm surfaces them. Notes appear in-app and via email digest for readers who opt in.

    Cost structure: no cash. The toll is time and attention. To benefit from Notes, you need to post regularly—multiple times per week—and engage with other writers’ Notes through comments and restacks (Substack’s term for sharing). The algorithm visibly favors writers who participate. If you only post when you publish a full newsletter, Notes won’t deliver meaningful reach.

    Effectiveness varies by niche. Politics, tech commentary, and literary fiction see strong engagement. B2B operators and service providers report tepid results unless they shift tone significantly toward personal commentary.

    One operator running a cybersecurity newsletter told me Notes drove 40 subscribers over three months—but required 90 minutes per week to maintain presence. At $10/month average subscription value, that’s $400 annual revenue for 54 hours of engagement labor. Whether that pencils depends entirely on your alternative uses for that time.

    Beehiiv Boosts: pay per subscriber, algorithmically allocated

    Beehiiv Boosts is a paid recommendation network. You set a cost-per-subscriber budget (typically $2–$4), and Beehiiv surfaces your newsletter to readers of similar publications through in-email placements and on-platform recommendations.

    Cost is explicit and controllable. You set daily or campaign-level spend caps. Beehiiv charges only when someone subscribes, not for impressions.

    The challenge: attribution and retention. Boosted subscribers come from cold recommendations, not organic discovery. Operators consistently report 30–50% lower engagement rates from Boost subscribers versus organic sign-ups, and higher unsubscribe rates within the first 30 days.

    One anonymized operator shared that 200 Boost subscribers acquired at $3 each ($600 spend) yielded 19 paying conversions at $8/month over six months—$912 gross revenue, $312 net after acquisition cost, before accounting for platform fees or content production. Positive, but marginal. For that operator, SEO traffic converted at nearly double the rate.

    Boosts work better for ad-supported newsletters where any engaged reader has value, rather than subscription models that depend on high intent.

    Ghost recommendations: reciprocal, manually curated

    Ghost’s recommendation system is manual and reciprocal. You recommend other Ghost newsletters; they (hopefully) recommend you back. Readers see recommendations after subscribing or in dedicated sections.

    Cost: relationship overhead. You need to identify compatible newsletters, reach out to operators, negotiate reciprocal placements, and monitor whether the traffic is remotely balanced. Most operators report asymmetric results—one side benefits more than the other.

    Ghost doesn’t algorithmically distribute your content. Recommendations live as static links unless a reader actively explores them. Conversion depends entirely on placement prominence and editorial context.

    The system favors established operators with existing networks. If you’re launching cold, Ghost recommendations offer little velocity.

    ConvertKit Creator Network: hybrid referral and paid

    ConvertKit’s Creator Network combines two models: free reciprocal recommendations (similar to Ghost) and a paid Sparkloop-style referral program where subscribers earn rewards for forwarding your newsletter.

    The referral side costs you per converted subscriber—either through direct incentives (gift a course, offer a discount) or through ConvertKit’s managed reward tiers. Operators typically spend $1–$5 per referred subscriber depending on reward structure.

    Effectiveness skews toward consumer-facing creators—productivity, finance, parenting. B2B and technical newsletters see minimal referral activity unless the content is exceptionally shareable or the reward is cash-equivalent.

    When to use which

    Use Substack Notes if your content benefits from commentary and you already spend time on social media. Notes substitutes for Twitter or Threads, not for SEO or paid acquisition. Treat it as audience development, not growth infrastructure.

    Use Beehiiv Boosts if you monetize through ads or affiliate revenue and can afford $2–$4 per subscriber without relying on immediate conversion. Boosts are discovery arbitrage—you’re buying attention in someone else’s inbox. Budget for higher churn.

    Use Ghost recommendations if you operate in a defined niche with peer operators at similar scale and have time to cultivate reciprocal relationships. It’s networking, not advertising.

    Use ConvertKit’s referral network if your content has strong word-of-mouth potential and you can structure compelling rewards without eroding margins.

    For most solo operators, organic SEO and one well-chosen paid channel (Google, Facebook, or a niche ad network) deliver better return than platform-native discovery features. The latter work as supplements, not replacements, for distribution you control.

    Want more operator-focused breakdowns like this? Subscribe to One Two Three Send—one article daily on the tools, tactics, and trade-offs behind running an online business.

    Heads up — some links in this article are affiliate links. If you sign up through them, we may earn a small commission at no extra cost to you. We only recommend tools we use ourselves.

  • ConvertKit vs. MailerLite vs. Brevo: which ESP for under 5,000 subscribers

    If you’re running a content business with fewer than 5,000 subscribers, your email platform choice matters more for cash flow than features. Most operators overpay for automation they don’t use, or underpay and hit walls when they need basic segmentation.

    Here’s how ConvertKit, MailerLite, and Brevo stack up when you’re still small enough that every $20/month counts.

    Pricing structure and breakpoints

    ConvertKit starts at $25/month for up to 1,000 subscribers on the Creator plan, jumping to $41/month at 1,500, then $66/month at 3,000. By 5,000 subscribers you’re paying $108/month. The free tier caps at 1,000 subscribers but strips out automation—useless if you’re trying to build evergreen onboarding sequences.

    MailerLite offers a free tier up to 1,000 subscribers with full automation included. Paid plans start at $10/month for 1,000, rising to $21/month at 2,500 and $32/month at 5,000. The pricing curve is gentler, and you keep all core features on the free plan.

    Brevo (formerly Sendinblue) bills by emails sent per month, not subscriber count. The free tier allows 300 emails/day—9,000/month. Paid plans start at $25/month for 20,000 emails. If you send weekly to 4,000 people, that’s 16,000 emails/month—you stay on the free plan. If you send daily, you’ll need paid. This model favors infrequent senders or operators with large lists who broadcast sparingly.

    Automation and segmentation depth

    ConvertKit’s visual automation builder is powerful but quirky. You can trigger sequences based on link clicks, tag applications, and custom field changes. The interface uses a node-based flowchart that gets messy past five branches. Segmentation works well—you can combine tags with custom fields using AND/OR logic.

    MailerLite’s automation editor is cleaner and faster to navigate. You get the same trigger options—email opens, link clicks, field updates—but the UI feels less cluttered. Segmentation is solid for basic use cases; advanced operators occasionally hit limitations when stacking multiple conditions with date-based rules.

    Brevo’s automation is the weakest of the three. You can build workflows, but the trigger options are limited compared to ConvertKit and MailerLite. Segmentation exists, but the interface is clunky. Brevo’s strength is transactional email and SMS—if you need those, it’s worth the automation trade-off. If you’re purely running a newsletter with welcome sequences, it’s less compelling.

    Deliverability and sending infrastructure

    All three platforms maintain strong sender reputations, but configuration matters. ConvertKit and MailerLite both enforce domain authentication (SPF, DKIM) and make setup straightforward. Brevo does the same but adds SMTP relay options if you want to route transactional mail separately from campaigns.

    Real-world deliverability is hard to benchmark because it depends on your list hygiene and engagement patterns. Operators report similar inbox rates across all three when lists are clean. The bigger risk is your sending behavior—if you import a cold list or blast infrequently, any platform will land you in spam.

    One edge case: MailerLite’s free tier includes its own branding in email footers unless you upgrade. ConvertKit and Brevo don’t add branding on free plans. If you’re staying free long-term, factor that in.

    Who each platform suits best

    Pick ConvertKit if you’re running a creator business with complex funnels—lead magnets feeding into paid courses, tag-based product recommendations, or multi-step nurture sequences. You’ll pay more, but the automation flexibility justifies it once you’re past 2,000 subscribers and actively monetizing.

    Pick MailerLite if you want full-featured email marketing without the ConvertKit premium. The free tier is legitimately usable, and the paid pricing scales gently. Best for newsletters, simple product launches, and operators who need automation but don’t want to spend $100/month yet.

    Pick Brevo if you send infrequently to a large list, need transactional email alongside campaigns, or want to add SMS down the road. The send-based pricing model is unusual but powerful for the right use case. Weakest choice if your primary need is sophisticated email automation.

    One thing to check before you commit

    All three platforms let you export your subscriber list as CSV, but automation export varies. ConvertKit and MailerLite let you duplicate and export sequences as templates. Brevo’s automation workflows don’t export cleanly—if you rebuild on another platform later, you’ll recreate them manually.

    If you’re just starting out and expect to migrate in 18 months, that’s not a dealbreaker. If you’re planning to stay put and scale, check the exit path before you build 20 automations.

    Want this kind of breakdown in your inbox? Subscribe to One Two Three Send for tool comparisons, pricing math, and operator-to-operator guidance every week.

    Heads up — some links in this article are affiliate links. If you sign up through them, we may earn a small commission at no extra cost to you. We only recommend tools we use ourselves.

  • Newsletter platforms bill subscriber tiers in blocks—pay attention to the cutoff

    Newsletter platforms bill subscriber tiers in blocks—pay attention to the cutoff

    Newsletter platforms bill subscriber tiers in blocks—pay attention to the cutoff
    Photo by Markus Winkler on Unsplash

    If you’ve ever looked at your newsletter platform invoice the day after hitting 1,001 subscribers and wondered why your bill jumped $40, you’ve met block pricing. Most newsletter platforms don’t charge you per subscriber—they charge per tier, and each tier is a block.

    Cross the threshold by one subscriber, and you pay for the entire next block. The difference between 999 subscribers and 1,000 can be negligible. The difference between 1,000 and 1,001 can cost you an extra $30–$50 per month, depending on the platform.

    Here’s how block pricing works, where the expensive jumps happen, and what you can do about it.

    How newsletter platform pricing tiers actually work

    Most platforms structure pricing in blocks: 0–1,000 subscribers, 1,001–2,500, 2,501–5,000, and so on. You pay a flat rate for each block, regardless of whether you have one subscriber in that tier or five hundred.

    Take MailerLite’s pricing as an example. As of mid-2026, the jump from the 1,000-subscriber tier to the 2,500-subscriber tier increases your monthly cost from $15 to $29. If you hit 1,001 subscribers on the first day of your billing cycle, you pay $29 for the month—even though you’re only one subscriber over the line.

    Beehiiv follows a similar model. Their Scale plan covers up to 10,000 subscribers at $99/month. At 10,001, you move to the next pricing conversation—often custom, often significantly higher.

    ConvertKit’s tiers jump at 1,000, 3,000, 5,000, and 10,000. The shift from 1,000 to 3,000 subscribers takes you from $29/month to $49/month. You’re paying for capacity, not usage.

    The most expensive thresholds to watch

    Not all tier jumps cost the same. Some are minor bumps; others double or triple your bill.

    The 1,000-subscriber threshold is the first major jump for most solo operators. Platforms often offer generous free or low-cost tiers up to 1,000 subscribers, then increase pricing sharply. Crossing from 1,000 to 1,001 can take you from $10–$15/month to $25–$50/month depending on the platform.

    The 5,000-subscriber mark is another cliff. At this point, many platforms assume you’re monetising and have budget. Expect monthly costs in the $75–$150 range once you cross it.

    At 10,000 subscribers, several platforms (including Beehiiv) move you off public pricing entirely and into custom plans. This isn’t necessarily bad—you may get volume discounts—but it removes pricing transparency and adds negotiation overhead.

    Two strategies for managing block pricing

    You can’t avoid tier jumps forever, but you can control when they happen and reduce the sting.

    Audit and clean your list before crossing a threshold. If you’re sitting at 1,050 subscribers and approaching your billing renewal date, run a re-engagement campaign. Remove unengaged subscribers—those who haven’t opened in 90+ days. Depending on your list health, you might drop back under the threshold and stay in the lower tier for another month or two. This isn’t about gaming the system; it’s about paying only for subscribers who want to hear from you.

    Time your growth if you can. If you’re running a launch, promotion, or paid acquisition campaign that will push you over a tier threshold, schedule it right after your billing cycle renews—not right before. Crossing from 980 to 1,200 subscribers two days before renewal means you pay for the higher tier for nearly a full month while barely using the capacity. Crossing two days after renewal gives you the full month to grow into the new tier.

    When block pricing actually works in your favour

    Block pricing isn’t inherently bad. If you’re growing steadily within a tier, you’re effectively getting a volume discount—your per-subscriber cost decreases as you add people without crossing the threshold.

    For example, if you’re paying $29/month for up to 2,500 subscribers, your per-subscriber cost at 1,001 subscribers is $0.029. At 2,499 subscribers, it’s $0.012. You’re paying the same flat rate but serving more than double the audience.

    The key is to stay aware of where the cliffs are, plan your growth around them when possible, and keep your list clean so you’re not paying for dead weight.

    Want to compare platform pricing structures before you hit the next tier? Reply with the platform you’re on and your current subscriber count—I’ll flag the next threshold and what it’ll cost you.

    Heads up — some links in this article are affiliate links. If you sign up through them, we may earn a small commission at no extra cost to you. We only recommend tools we use ourselves.

  • Newsletter archives: indexed, searchable, or locked behind login?

    Newsletter archives: indexed, searchable, or locked behind login?

    Newsletter archives: indexed, searchable, or locked behind login?
    Photo by AbsolutVision on Unsplash

    Every newsletter you send lives in two places: the inbox and the archive. Most operators obsess over the first and ignore the second. That’s a mistake—your archive strategy directly affects how much organic traffic you capture, whether old content drives new signups, and how long each piece of writing stays valuable.

    There are three common ways to handle newsletter archives, and each comes with trade-offs worth understanding before you pick one and forget about it.

    Fully public and indexed

    This is the default on platforms like Beehiiv, Substack, and MailerLite. Every issue gets a public URL. Search engines crawl it. Readers can land on any post without subscribing first.

    The upside: you turn every newsletter issue into an SEO asset. A post you sent six months ago can still pull in traffic from Google. If someone searches “how to structure a welcome sequence,” your archived issue shows up. They read it, see the subscribe box at the bottom, convert. You’re building a content library that works even when you’re not actively promoting it.

    The downside: there’s no exclusivity. If all your content is free to read without subscribing, the only incentive to join your list is convenience—getting new posts in the inbox instead of checking your site. That works fine if your newsletter is built around timeliness or curation, but it undercuts the value proposition if your main draw is access to ideas and frameworks.

    Platforms that make this easy: Beehiiv auto-generates a web version for every send and indexes it by default. MailerLite does the same. Substack treats the newsletter as a blog with an email layer on top—every post is public unless you explicitly paywall it.

    Searchable but login-gated

    Some operators make archives visible to search engines but require an email signup to read past the first paragraph. ConvertKit supports this if you host your own archive page and use their API to gate content. Ghost has built-in members-only posts that let you tease content in search results but lock the full text.

    The upside: you get some SEO juice—your posts show up in search, the headline and first few lines are crawlable—but you preserve the exclusivity of the full content. Someone searching for your topic finds you, clicks through, and has to subscribe to keep reading. It’s a softer paywall than going fully private.

    The downside: execution matters. If your meta description or preview text doesn’t give enough context, bounce rates spike. If you gate too aggressively, Google may de-prioritize your pages because users don’t get what they expect. And you’re adding friction—some readers who would have converted after reading the full post bounce instead.

    You also need to maintain the infrastructure. If you’re self-hosting with ConvertKit or Ghost, you’re responsible for the archive page, the gating logic, and making sure it doesn’t break. That’s more surface area than just letting the platform handle it.

    Completely private

    No public archive. No indexed pages. The only way to read your content is to be on your email list. This is common with operators who treat the newsletter as a closed loop—your writing exists only in inboxes.

    The upside: maximum exclusivity. Joining your list is the only path to your ideas. If your positioning is “I share what I learn, subscribe to get it,” this reinforces scarcity. It also simplifies your stack—you don’t need to manage a website, worry about SEO, or think about duplicate content.

    The downside: you leave traffic on the table. Every issue you send is a one-time event. If someone discovers you three months after you wrote your best post, they can’t read it unless you resend it or manually share the email file. You’re also missing out on backlinks—other sites can’t link to your posts because there’s no public URL. And new readers can’t sample your work before subscribing. You’re asking for an email address based on your bio and maybe a landing page, not a body of proof.

    What most operators should do

    If you’re building a content-driven business and you’re not selling exclusivity as the core product, default to public and indexed. The compounding effect of searchable archives outweighs the perceived loss of exclusivity for most solo operators. You’re not the New York Times—no one is going to pay just to get your essays in their inbox unless the inbox experience itself is significantly better than reading on the web.

    If you’re in a high-value niche where your expertise is the differentiator and you want to use content as a lead magnet for consulting or courses, consider login-gated archives. You still get found, but you capture the email earlier in the journey.

    Go fully private only if your newsletter is explicitly a closed community or if you’re experimenting with extreme scarcity positioning. It works for some operators, but it’s the exception.

    One last thing: whatever you pick, make sure the back catalog is easy to browse. If someone lands on one post and wants to read more, they shouldn’t have to dig through a messy archive page or rely on search. A clean, chronological archive with good navigation keeps readers on your site longer—and that’s when conversions happen.

    Which strategy are you using? Hit reply and let me know—or subscribe below if this is your first time reading.

    Heads up — some links in this article are affiliate links. If you sign up through them, we may earn a small commission at no extra cost to you. We only recommend tools we use ourselves.